Chocolate-Coated Ice Cream Bars

For Christmas, I received the book Chocolate Recipes and Techniques from the Ferrandi School of Culinary Arts and as part of my chocolate study, I read many of the recipes. While I gained inspiration from in terms of flavour and texture combinations (and will surely return to them in the future), what stood out was the section on frozen desserts. Maybe it's because I'm dreaming of summer, maybe it's because it was different from the other books I've read. Either way, I decided my next foray would be chocolate-coated ice cream bars. 

Now, last week, I blogged about making strawberry ice cream with chocolate fudge brownie pieces. For several years, I've been making a quart of ice cream to enjoy during the summer. Knowing I wanted to try making ice cream bars, I had already ordered a mold from an online retailer. I put the mold to good use, filling four of the eight wells with ice cream before transferring the rest of the mixture into reusable ice cream tubs. (I cut the mold in half to make it easier to work with.) I let these set in the freezer until I had time to coat them in chocolate. On Wednesday evening, despite a long day at work with too many hours on my feet, I decided to carpe the ol' diem and get this done.

Since I had only four ice cream bars and the recipe said it would coat ten, I made half the recipe. It couldn't be simpler. Melt dark chocolate to 40 degrees and then add grapeseed oil. Stir well and dip.

I dipped the first two bars, but found it tricky to get them fully coated because of the vessel I was using to hold the chocolate. For the second two bars, I spooned the chocolate over the ice cream bars. Both methods worked fine provided I took a one-and-done approach. If I tried to re-dip or fill in missed spots, I ended up with a rippled coating. If I were to do this again, I'd make double the required coating, giving myself more to work with.

Once the bars were enrobed, I popped them back into the freezer for 20 minutes to fully solidify. And then I packaged them individually, to be enjoyed on a hot summer day. (Or on a Friday treat day...)

What can I say? They look good. They taste great. 

The viscosity of the chocolate was such that it produced the perfect chocolate shell -- not too thick, not too thin, and perfectly capable of containing ice cream as it begins to soften and melt. And the addition of the grapeseed oil made it easy to bite through the shell, directly out of the freezer. Top marks to the Ferrandi School of Culinary Arts.

Look out, Haagan Dazs, I'm coming for you!  

Strawberry Brownie Ice Cream

Since treating myself to a KitchenAid ice cream maker attachment several years ago (a pandemic indulgence spurred on by my sister and mother), I've made a quart (or so) of ice cream each summer to enjoy. Among the hits have been malted ice cream with crushed Maltesers, sour cherry ice cream with chocolate pieces, and blueberry ice cream with cheese cake bits. I've also tried lemon sorbet, which was especially good with vodka. 

This year, looking to match or surpass the wonder that was blueberry cheese cake ice cream last summer, I got to thinking that strawberry ice cream would be delicious. And then it hit me that the perfect companion would be my mother's chocolate fudge brownies. In addition to being absolutely heavenly, her brownies also don't really freeze even when placed in a cookie can in a deep freezer for several weeks (don't ask how I know this). That means that they shouldn't be rock solid (and unpleasant) in an ice cream mixture. 

After consulting a number of recipes online, I decided to modify the Driscoll's recipe for blueberry ice cream that I liked so much last summer. I bought a pound of fresh strawberries and chopped them before cooking and pureeing them. While they chilled in the fridge with the cream and milk, I mixed up a batch of brownies and baked it on a pizza pan. Once cool, I chopped up a third of the thin brownie into 1cm cubes and froze them. About 24 hours later, we were able to churn the ice cream and layer it in a tub with the brownie pieces. I also molded a few strawberry ice cream bars (no brownie pieces) for a chocolate experiment (stay tuned!). Then into the freezer!

The yield this time consisted of one quart container, two small individual serving containers, and four bars. The flavour is exceptional. There's just nothing like fresh strawberries. 

I definitely will have to buy a box of sugar cones so that I can enjoy a sweet treat throughout the summer!

Maple Molasses?

Last week, I received an email from Crosby's introducing their new product: maple molasses. Curious, I followed the link to their website. Sure enough, they have blended maple syrup and (presumably fancy) molasses into a new offering. While I think it is meant to be a pancake syrup, they are releasing new recipes featuring it as an ingredient. First there were muffins, then there were cookies. Both seemed appealing. 

Unfortunately, Crosby's Maple + Molasses doesn't appear to be available in local stores yet and I wasn't about to pay the exorbitant shipping fee ($24.01!) for the $8.99 bottle, so I quickly returned to my previously scheduled programming. 

But the "Wholesome Maple + Molasses Peanut Butter Muffins" had infiltrated my brain and I couldn't stop thinking about them (peanut butter fiend that I am). And so I returned to their website to read more about the product. The label states that the product is 70% maple syrup, which was enough information for me to mix my own reasonable facsimile. I was in business! (Metaphorically, of course. I am not going to be producing a Maple + Molasses knock off for sale.)

The recipe for the muffins was of interest for the inclusion of both rolled oats and peanut butter. In my head, that meant fibre and flavour. They were quick to mix up, taking less than 10 minutes, and they baked in only 18 minutes. Voila!

Now, I'm not sure how wholesome these muffins actually are. They have three different types of sugar (brown sugar, maple syrup, and molasses) and they contain peanut butter, which is typically high in fat. According to the online calculator I used, they contain 180 calories, 4g fat, 2g fibre, and 5g protein. Of course they do wonderful things for one's mental health, so everything in moderation (including moderation) and all that jazz. 

The texture is light and fluffy, which is surprising considering they contain old fashioned rolled oats. They aren't overly sweet and the peanut butter flavour is present but not overpowering. If you really wanted to be extra, you could add peanut butter Chipits or chocolate chips to these, or even some nuts.

Definitely a keeper, as Trooper Ron would say!


Fruit & Nut Bars

After a brief break from my chocolate study, in pursuit of other kitchen adventures (like Oven Porcupines and Cranberry Orange Muffins), I decided it was time to get back to it. This week's endeavour: transform the remains of a delicious milk chocolate Easter bunny.

Now, you may be wondering why one would want to transform an Easter bunny instead of just eating the Easter bunny. That's a fair question. The bunny was mostly solid and quite thick, so biting into it felt like it might damage the teeth. Instead, I found myself attacking it in rather gruesome fashion to chop it into more manageable pieces. I decided the best thing to do would be to melt it down and turn it into something else, like chocolate bark. And that's when I started thinking about some inclusions I had on hand in my chocolate stash. 

Over the years, I've experimented with a variety of freeze-dried fruits and berries. Most commonly, I've ground them into a powder and used them to create truffles and other chocolates, but I've always wondered what they would be like used whole or chopped into pieces. Would the texture be too dry and unpleasant? Would it be chewy or sticky? Could it be used to create a naked chocolate bar in the same way that dried fruit is? There was only one way to find out. 

I took a knife to the bunny and chopped it into small pieces. The milk chocolate chunks weighed 130g. Now, that's a very small amount of chocolate to work with and almost impossible to temper, but I decided not to add callets because I didn't want to waste ingredients if the experiment failed. With the chocolate prepared using the direct tempering method, I added about 8g of freeze dried blueberries and about 15g of chopped walnuts. I stirred them in and then poured the chocolate to a silicone bar mold. I had enough to make four small bars. I popped them into the fridge for 15 minutes and once they were set, I unmolded them. 

The result? Four tasty chocolate bars. While they have some of the characteristic shine of well-tempered chocolate, they also have a bit of a mottled finish as a result of using a silicone mold that can't be polished in the same way that polycarbonate molds can. Since these are a test, that doesn't bother me. The focus of this week's experiment, after all, is texture. 

I'm quite surprised to report that the freeze dried fruit is delicious in this application. As hard as it is to believe, I wasn't really able to tell that the blueberries were freeze dried. They had a bit of a chew, but not unpleasant, and they weren't dry or chalky at all. My fear that they would be unpalatable was unfounded.  

Fruit and nut is a classic combination. And using freeze dried fruit and berries is definitely worthy of further experimentation, particularly in chocolate bark. 

What fruit and nut combo would you like to see? 

Oven Porcupines

Recently, a friend loaned me her copy of the Betty Crocker Recipe Card Library. This sparked discussion of a few of the well-known recipes, including "Oven Porcupines," which were known in my family as "Porcupine Meatballs." Naturally, I had to try making them. 

Now, I tend to think that I have a very well stocked larder and an impressive collection of herbs and spices. But this simple recipe nevertheless required a trip to Bulk Barn to get something I've only used once before in a tuna salad creation about two decades ago: celery salt. Fortunately, I was able to purchase a few tablespoons (aka a lifetime supply) for the low cost of $0.31. 

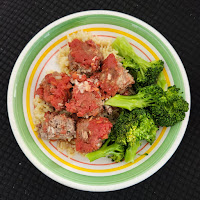
Armed with my ingredients, I set about preparing this dish. I immediately ran into a problem as I mixed the ingredients and attempted to form balls -- they just wouldn't hold together. I ended up adding an egg to bind the mixture. With all of the balls formed (about 25 in total), I was ready to put them in the oven. Following the instructions, I soon encountered a second problem: the rice wasn't cooking. After an hour, it was still crunchy. I added more water. I left the meatballs in the oven for additional cook time. I cursed under my breath. I cursed loudly. Eventually they were edible, but they definitely did not cook in the time outlined in the recipe. I ate them with some brown rice and broccoli.

If I were to make these again, I would probably ignore the instruction to use "regular" rice and instead swap it for converted (parboiled) rice to ensure that the rice cooked in a reasonable time. (It's worth noting that the new version of this recipe on the Betty Crocker website does just that -- more on that in a moment.) I'll admit that I was surprised to find that the half teaspoon of celery salt did make a difference and gave the meatballs a delicious, unexpected flavour. So, it's worth the trip to the store to buy it if you don't already have it. 

Now, if you're curious to try these yourself, here is the original recipe. Beware! The new version on the Betty Crocker website is nothing like the original (calling for Multi-Bran Chex cereal) and the reviews are not good. And definitely consider using converted rice to make your life easier. 


Parmesan Herb Bread

What do you do when you have rosemary in your fridge that has to be used? You bake parmesan herb bread, of course!

Several months ago, my boyfriend found a recipe online for Rustic Garlic Parmesan Herb Bread by Stay at Home Chef. We made it to accompany a meal and really enjoyed it. It was relatively quick to prepare and the flavour and texture were perfection. The best part of the recipe, though, was that it suggested you form the dough into two small boules instead of one larger loaf. So, after consuming one with our supper, we tucked the other away in the freezer to enjoy the following week. Built in portion control! (And let's be honest, when it comes to freshly baked bread, we all struggle with that.)

While I'm a big believer in making a recipe as written the first time (unless there is an obvious error), I'm also one to tinker with recipes, make substitutions, and make them my own. So this time I cut the garlic, swapped in fresh rosemary instead of a selection of dried herbs, and added a little extra parmesan (because, like chocolate, you measure cheese with your heart). In less than 5 minutes, I had a smooth dough ready to begin its first rise.

As I reflect on just how easy this recipe seems to come together, I realize that the method is just as important as the ratio of ingredients. If you put the liquid in the bowl first, it's much easier to incorporate the dry ingredients than if you do the reverse. I learned this years ago when I did Bake for the Cure. One of the chefs led participants in making focaccia and that was his advice for making bread in a stand mixer. Very smart. 

After shaping two boules, leaving them to rise again for another 20 minutes or so, and scoring the tops, I popped them in the oven for 20 minutes. And voila! Delicious homemade parmesan rosemary bread. 

As much as I want to tear into one of these right now, they are both destined for the freezer to be enjoyed another day. They'll be perfect with soup or curry -- and I'm certain my future self with thank me for this partial meal prep.

Until then, do you have a favourite bread recipe? 


Cranberry Orange Muffins

A few weeks ago, I stumbled upon a YouTube channel called Cooking the Books. I quickly fell down the rabbit hole, watching episode after episode after episode. The premise is simple: Anna cooks a recipe (or a day of meals) from a vintage cook book each week. It's entertaining to see how food trends and preferences have changed, as well as gender roles and their representation through cook books. But it's most fun to spot well-loved cook books from the past and relive a moment from childhood.

It was because of this channel that I recently became obsessed with looking at the Betty Crocker Recipe Card Library again. My mother had this when I was a kid and I loved flipping through it, especially the cards devoted to children's parties and entertaining. I remember vividly a snowman cake that my mother made for my winter birthday. 

Now, you can buy these sets secondhand from online retailers, but the prices are high (ranging from $40 to $90+) and the shipping would be expensive because it's a weighty collection. I got lucky with my Facebook appeal, as a friend loaned me her set (which belonged to her mother). I spent a few hours this week rearranging the cards (with her permission) into the original order. 

As I sorted through cards, I stumbled upon one for "Favorite Muffins." One of the variations was for cranberry-orange muffins, which called for chopped cranberries and orange zest. I decided to try them. 


Ingredients:

1 egg
1/2 cup milk
1/4 cup salad oil
1 1/2 cups flour
1/2 cup sugar
2 teaspoons baking powder
1/2 teaspoon salt
zest of one orange
1 cup cranberries, chopped

Method:

Heat oven to 400F. Grease bottoms of 12 medium muffin cups. Beat egg; stir in milk and oil. Mix in remaining dry ingredients just until flour is moistened. Batter should be lumpy. Fold in cranberries.

Fill muffin cups 2/3 full. Bake 20-25 minutes or until golden brown. Immediately remove from muffin pan. Makes 12 muffins.

The recipe was quick and easy. And they baked up in only 18 minutes in my oven. The texture is nice and the orange flavour really punches through. They are perfect as a snack -- and at less than 100 calories each (according to MyFitnessPal), they are guilt-free. Top marks, Betty! (Yes, I know she isn't a real person.)

What is striking about this recipe, beyond the delicious flavour, is how small the muffins are. Compared to what we're used to today in bakeries and coffee shops, these look like miniature muffins, even though they bake in a standard muffin pan. I'm sure none of us are surprised that portion sizes have expanded over the last 50-60 years, but this really puts it in focus.

I suspect that within this recipe card set, there are a number of well-tested, reliable, quality recipes. And that is one reason to hold onto the set if you have it or buy it if you find it at a flea market. But as I've begun flipping through the cards, I've noticed one small issue with the set. A number of the recipes, at least in the baking sections, rely on Betty Crocker mixes as a foundational ingredient. (This muffin recipe was an outlier in that regard.) Unfortunately, many of those products aren't available anymore (at least not here in Canada). For example, one of the cards I reviewed started with a gingerbread cake mix. I'm not sure I have ever seen such a beast. Another uses a dry icing mix, which is also not available. All to say, it may not be possible to make some of the recipes in this set, because of the reliance on prepared mixes. Nevertheless, there's still a lot available that is made entirely from scratch. 

I'm thrilled to have delicious muffins for my lunch bag this week. And to stroll down memory lane with these recipe cards. 

Easter Carbs

What better way to break forty days of fasting for Lent than with carbs?

It's common among my friends and coworkers to give up sweets, potato chips, and/or pop during Lent. I admire their commitment and will power. I know we talked about this sort of thing when I was a kid attending a Catholic school, but I don't actually remember giving anything up myself. Maybe I did and was so traumatized by it that I've blocked it from my memory. Or maybe because it was a "small t" tradition, it wasn't overly emphasized in my family. Whatever the case, I don't normally participate in fasting for Lent.

In more recent years, though, I've picked up alternative practices. For example, for a few years in a row, I collected 40 food items to donate to the food bank. Another year, I selected 40 items to donate to charity (inspired by a 40 bags for 40 days challenge that just seemed to be a bit too much of a commitment). When you shift your perspective in this way, you find that there are many options to make an impact that don't involve food. Donate $40 to a local charity. Volunteer for 40 hours with a non-profit organization. Engage in 40 random acts of kindness. This is my preferred way to observe Lent, but everyone should do what works for them. 

Now, despite the fact that I haven't fasted, I'm still happy to participate in the breaking of the fast. From chocolate Easter bunnies to hot cross buns and everything in between, this is one calendar custom with delicious traditions.

Today, I'm happy to have an invitation to a turkey dinner. Naturally, I felt compelled to make dessert. Inspired by Facebook memories of Easter past, I decided it was time to make cupcakes again. French vanilla sponge with vanilla buttercream dyed a pale yellow and topped with rainbow Eggies (and a few with Junior Mints Eggs). The colour is on point and the flavour is top notch. 

But before I get to that, I'll start my day with one of the raspberry Easter eggs that I made earlier in the month. Alongside a cup of coffee, I'm sure it will be heavenly. 

I know I've said more than once that I thought a particular confection was my best work yet, but the response to these raspberry Easter eggs has been incredibly positive. The raspberry ganache centre had a beautiful texture and the addition of the lemon juice really brought out the fresh berry flavour. One day, I'll sell these in a very chic chocolate lounge. 

And of course, I can't forget to mention hot cross buns. Ever since moving to Cape Breton, I've been hunting for the best hot cross buns. Almost every year, I take off Holy Thursday and visit local shops and bakeries, buying all of the delightful things I can find. It's less about Easter and more about the start of Spring (which brings with it balcony coffees, gardening, and Birkenstock season). I've bought hot cross buns in North Sydney, Sydney River, Sydney, and Glace Bay. But there are two key issues. First, it's not uncommon to have to buy hot cross buns in large quantities. One year, the smallest pack I could find was 8. Now, as one person, I can't possibly eat 8 hot cross buns before they go stale and hot cross buns are the sort of thing were you eat one or two to get your fix and then you're over it for another year. The second issue pertains to the icing cross that is common here. I've seen it made with a very loose royal icing and I've also seen it made with buttercream. While it adds a delightful sweetness if consumed immediately after buying, leave it even a few hours and the sugar begins to absorb moisture from the air and the icing begins to weep and melt. It's a sticky mess (and that impedes toasting them when they're a few days old). 

Consequently, for the last few years, I've made my own hot cross buns. I use a small batch recipe that I found online, which makes only 6 small buns and I riff on that to make it my own. (Next year I may try cutting the recipe in half, because really 3 would be the ideal number to make.) This year, I used a bread lame to cut the crosses into the buns, thereby eliminating the need for an icing cross (I realize that traditionally a flour paste is used to bake the cross into the top of the bun, but it seemed like an unnecessary step). And I also glazed them with apricot jam, which gave them a delicious flavour. Next year, I plan to substitute apricots or blueberries for the more common raisins. (I may have to write a note to my future self so that I remember to try one of these variations.)

Until then, I'll enjoy this year's Easter carbs while I can, for Eggies and hot cross buns come but once a year.  

Happy Easter!


Raspberry Easter Eggs

Over the years, I've made many different Easter eggs. Peanut butter fudge, Cadbury creme egg dupes, strawberry cream, orange creamsicle, Oreo cookie, potato chip, Rice Krispies, peanut gianduja... They've all been delicious and it would be easy to just pick one and repeat it (especially a peanut butter one). But Tuesday night chocolate study and this blog aren't about what's easy! They're about trying new things and learning in the process. And so as much as I'd like to be making myself a gianduja bunny again, this year's Easter eggs will instead have a dark chocolate raspberry ganache filling.

Now, I've experimented with ganache a fair amount, particularly with alcohol as the flavouring. Beer, cider, port wine, Cointreau, brandy... I've also made a variety of truffles flavoured with oils (peppermint, orange, key lime, lemon, strawberry), and even a few that used pulverized freeze-dried fruit. But I can't recall making a truffle with fruit puree (though I certainly used fruit purees in buttercream frosting when I was doing more cake decorating).

In preparation for my Tuesday night chocolate study, I reviewed a number of recipes. I settled on a recipe in the Ewald Notter book The Art of the Chocolatier as a base recipe upon which I would riff. And that meant I needed to make raspberry puree.

I started with half a bag of frozen raspberries, tossed them into a pot with about 20 grams of sugar, and heated and stirred until they started to break down and become liquid. Then I pureed them and strained out the seeds, first with a mesh strainer and then with multiple layers of cheese cloth. Neither was particularly efficacious. After significant effort (and mess), I had about 120 grams of puree. I set it in the fridge and called it a night.

The next day, I prepared the ganache. Based on the quantities outlined in the Notter book, I decided to half the recipe. I have to admit, I was a little bit nervous making this ganache. I've never added lemon juice to chocolate and I worried that it might break or seize. Presumably the addition of lemon juice was meant to enhance the flavour of the raspberry puree, so once the ganache was a beautiful emulsion, I took a deep breath and added the acid to the mixture. The gods favoured me and the ganache didn't split. And the resulting flavour was incredible.

Sadly, the gods didn't favour me for long. I'm not sure if the chocolate I was using as seed was itself out of temper or (more likely) if I was impatient and rushed the process, but my first attempt at shelling was a failure. I knew when I took the mold out of the fridge that the chocolate was not in temper. So I started over. I wasn't present the first time around, but I was hyper-focused the second time and it worked as expected. 

Next I filled the shells and set the mold aside to crystallize before proceeding with capping the following day. When I tapped out the finished eggs, I had one casualty, which cracked coming out of the mold. The rest were perfect. 

As I write this, a week later, I am in the process of doing it all over again so that I will hopefully have 23 eggs in total to share with friends. The molds are shelled and filled, and tomorrow night before a museum board meeting, I hope to cap them.

Now, about that casualty. I did not discard it. Nay, I uncharacteristically ate it. (If you've been reading these blogs long enough, you know that I don't normally sample the finished product so soon after it's been made). What can I say about these eggs? They are incredible. The raspberry flavour is intense. The pairing with dark chocolate is ideal, ensuring the eggs aren't overly sweet. While I'm not a huge lover of raspberry, I would definitely make these again. I'm thrilled with how they turned out and can't wait to share them with family and friends.

Yes, I said family. I don't normally mail chocolate home, but my sister's birthday is coming up and there is a Canada Post flat rate box headed her way. Conveniently, there's a little room left in it for three Easter eggs. Hopefully she and my parents will enjoy them (though I'm guessing they won't survive until Easter Sunday). 

This experiment definitely has me wanting to try additional chocolate and fruit puree pairings. I'm curious: What fruit and chocolate pairing would you use in an Easter egg? 

St. Patrick's Day Decor

A few weeks ago, I mentioned in a post that the selection of St. Patrick's Day decor in the local area is abysmal. For several weeks in a row, my boyfriend and I searched high and low for something -- anything! -- that wasn't a gaudy plastic dollar store wonder. We found nothing. Despite the fact that this type of seasonal decor does exist at major chains across the United States, it can't be found here for reasons known only to marketing gurus. 

And so we were left to our own devices.

I purchased a 15" wooden round from Michaels. It took a few days to decide on how to finish it. Paint? Stain? White? Orange? Eventually I decided on a watered-down acrylic paint in "happy green" (or as I like to call it, "Janice Lime"). I brushed it on with a foam applicator and wiped it back off with a paper towel.

Now, originally I wanted to make a sign that would hang near my coffee station, so I was hoping to find a cutting design for a St. Patrick's coffee shop. I did, but I didn't like the fonts that were used or the overall look of the design and I just didn't have the energy to create my own. Instead, I grabbed the one for St. Patrick's Brewing Company (available in Megan Hardy Designs here). I pulled a piece of green permanent vinyl from my stash and cut the sign as large as my 12" piece would allow. Mercifully, it was easy to weed away the excess vinyl, revealing the design. 

Strangely, there was nothing in the centre of the beer bottle. My eye kept returning to it, feeling it looked odd. So back to the computer I went. I pulled one of the shamrocks from the original design, resized it, and cut it on a corner scrap of vinyl. I added it to the larger design and decided it was a definite improvement. A piece of transfer tape and about a dozen attempts at positioning it on the circle, using a ruler to try to centre it, and I was done!

Ta-da! 

Now, I still look at this and think it needs a little something more. Maybe a rope border around the edge, for example, to set it off. Though I've strolled the craft supply sections of multiple stores, nothing has spoken to me yet. But until then, this is my St. Patrick's Day door hanger. 

I also purchased a few items to spruce up my space from Temu, including a green shamrock table runner, a fabric table runner with a leprechaun on a truck, and a set of shamrock mini lights. And, of course, our St. Patrick's Day gnome that we made a few years ago is out. This year, instead of hanging on the door, he's sitting on my china cabinet. Finally, there's the little chocolate leprechaun house that I made last week

It's feeling festive here. And that's just what we need at this time of the year -- as Fool's Spring fades once more to Winter's last hurrah.

See you next week for this year's Easter eggs!

Leprechaun House

Last week I was in the mood to make something with my chocolate supplies. I went to the sideboard they are stored in and pulled out a new silicone mold I had purchased from Temu before Christmas. In November when I saw it, I had ambitious ideas that I would make a series of small chocolate houses to give to friends. Of course, time got away from me and I made tiny gingerbread houses instead. Still, I have been thinking about that mold and wanting to try it. Who says "gingerbread" houses are only for Christmas? There is a trend on YouTube right now for crafters to make gingerbread crafts for Valentine's Day and Easter. And my sister, who was very late taking down her Christmas tree this year, has taken to saying, "There are no rules."

Well, if there are no rules, then why can't I make a chocolate gingerbread house for St. Patrick's Day?

I grabbed a bag of green candy melts and set about guessing how much (compound) chocolate I would need to fill the cavities for the four walls and two roof pieces. It wasn't particularly scientific, but I piled chocolate wafers into each well and then tossed in an extra handful for good luck. It was approximately 8.5oz of chocolate based on how much is left in the bag. And it did the trick.

Now, I have to pause here to comment about candy melts. The selection available lately is dreadful. Bulk Barn has the Merckens brand, but only has three colours (yellow, orange, and blue as of writing this post). Atlantic Superstore carries Wilton brand, but only in chocolate and bright white. Michaels stopped carrying Wilton brand a few years ago and ever since has only stocked Sweet Tooth Fairy brand, and while they have a better selection of colours, the colours are not true. The red and blue that I've had in the past are much lighter than the packaging would suggest. And the green? Well, the bag is lime, the name says "light green," and it looks like mint. Good candy melts are hard to find.

Anyway, as I mentioned last week, silicone molds are a little finicky to work with. Nevertheless, using a bench scraper I was able to level the chocolate in the mold (mostly). After it had set in the fridge for 15 minutes,  I carefully unmolded the pieces. I was very impressed with the detail. Originally, I thought I would assemble the house using royal icing, but decided to try assembling with leftover candy melts instead. It worked great and set up far more quickly than I would have anticipated. I left it for a few days while I contemplated how best to decorate it.

Now, I don't have any St. Patrick's Day chocolate molds. (Shocking, I know!) So I had to get creative. First I tried melting some dark green candy melts left over from another food craft project, but no matter what I did, they wouldn't melt. I'm not sure if the humidity of last summer got them or if candy melts actually do have an expiry date, but they simply would not cooperate. So instead, I melted some of the light green ones and added oil-based food colouring. I got the colour I wanted, but I hope no one eats it because the taste is incredibly bitter. 

I used the darker green to pipe two shamrocks on a piece of wax paper. I also filled a few candy-shaped molds to use as architectural columns. And finally I made a green teddy bear (because there are no rules, right?). I eventually also made another trip to Bulk Barn (it's getting to be a weekly thing) and acquired some orange, green, and rainbow candies. Armed with a small bag of royal icing, I began decorating.

With sour punch straw columns, cry baby trim, life saver windows, and a sour strap walkway, it's a Leprechaun's ultimate dream home! I particularly like the orange door and the molded candy ridge cap. 

As for the silicone mold from Temu, I'm very happy with it. It's not perfect -- the roof pieces could be a little wider to create an overhang. But it's detailed and cute, and the heart on the back reminds me of a claddagh ring. I can imagine making little chocolate "gingerbread" houses in a variety of colours -- and I'm betting a white one would look great as part of my Christmas decor. 

Until then, this leprechaun house is perfect for St. Patrick's Day. 


Silicone Molds and Online Retailers

Unless you live under a rock, you've likely heard of Temu. The app is taking the world by storm, providing access to deeply discounted products produced in China. Cheaper than a dollar store and delivered directly to your door, it's easy to see the appeal. 

More importantly, from my perspective anyway, is that it seems to have those things that you search for but can't seem to find after hours of hunting locally. I can't tell you how many times I've spent an afternoon searching 5+ locations for something only to return home and order it online. For example, have you gone looking for St. Patrick's Day decor? The options, at least where I live, are abysmal. Michaels and Winners have dropped the ball (despite the fact that in the US Michaels has an impressive selection of decor for the March holiday). The only options are cheap glittered items and plastic garlands at Dollarama (though, to be fair, they do seem to have expanded their St. Patrick's Day apparel). Temu, on the other hand, has all kinds of St. Patrick's Day decor! Table runners, shamrock mini lights, door hangers! It's a veritable treasure trove!

Now, listen, I know Temu has its issues. There's the environmental impact of shipping goods halfway around the world; the ethical concerns associated with production of the items (brand name dupes and labour practices) and consumption culture more generally; the safety of products and the chemicals that may (or may not) be used in items; the access to and security of personal information shared through the app; and the generally addictive nature of gamified shopping. It's not without it's faults (or its critics) and it may not be for everyone. Nevertheless, it's a thing and it won't be going away anytime soon. If anything, it's poised to grow, given their intense social strategy which is setting the stage for group buying in the future.

But that's not the point of this blog. (Though I will say that I'd love for someone to calculate the environmental impact of me driving around searching for something for an entire afternoon compared to an online purchase that is delivered to my door.)

You can find things on Temu that you never knew existed and that certainly aren't available at your average store. For example, while there are silicone chocolate molds available at Michaels, Bulk Barn, and Dollarama, I've never seen one of a gingerbread house. In contrast, I have seen them at Amazon and Temu. 

Now, if one's creative impulses are insisting that one mold a chocolate gingerbread house, well, what is one to do but buy the mold?

Most professional chocolatiers use rigid polycarbonate molds. They can be polished, produce excellent shine, and are easy to handle. They are also an investment at a higher price point. Silicone is generally avoided because it can't be polished, the shine produced isn't as glass-like as polycarbonate, and they are notoriously difficult to manipulate. To shell a mold, you normally fill it with chocolate, then invert it and tap so that the bulk of the chocolate drains out, before scraping away the excess chocolate. That's just not possible with a floppy silicone mold. Still, silicone has a place, particularly for intricate shapes that could easily break when unmolding and for food crafting that is more form over function. They also offer the advantage of a low price point, which is convenient if it's a one-off thing like a custom order. One common solution is to cut the mold into individual pieces to make it easier to manipulate, but I admit I haven't been able to bring myself to do that. Maybe one day.

The "building block Christmas house" chocolate mold on Temu cost $6.98 and arrived in about 10 days. The quality of the silicone is similar to that of other molds I've purchased. It was easy to unmold the pieces and clean up was quick and easy. And while it was a little difficult to manipulate, as expected, by placing it on a cookie sheet it was tolerable.

Did I need it? No. Do I love it? Yes. Will there be a chocolate gingerbread house for all seasons? Quite possibly. 

Stay tuned for next week when I unveil what I've made with this treasure from Temu.

Basque Burnt Cheesecake

Before Christmas, I was watching an episode of Crime Scene Kitchen during which the mystery dessert was Basque burnt cheesecake. I had never heard of it before, but resolved to try making it.

Now, as much as I enjoy baking, cheesecake it not something I've ever bothered with. It's too finicky. Too precious, as the cool kids say these days. You'd swear you were handling an explosive device. All of the ingredients have to be at room temperature. You have to use a water bath. Bake it low and slow, and aim not to get any colour on top. Leave it in the oven to cool before putting it on a counter to cool before putting it in a fridge to chill. Pray. Do everything possible to ensure it doesn't crack or collapse. And then when it inevitably does, try to disguise it with artfully arranged toppings. 

No thanks. I'm good. I've seen this show before and know how it ends. (I'm not pointing any elbows, but someone reading this blog has made a delicious orange cheese several times now and no matter what they do, they still face the heartbreak of massive fault line every time.)

Basque burnt cheesecake is entirely different. You bake it hot and fast, seeking a dark colour on top that gives a hint of caramel flavour. When you remove it from the oven (immediately after baking), you want it to collapse and crack. No sacrificing of a goat required here. This one is foolproof. 

So how does it taste? 

Absolutely delicious. I was a little suspicious when I first took it out of the oven, worried that it might be too eggy or have more of a soufflé texture. As it turns out, my fears were unfounded. It was creamy and not overly sweet. Topped with dulce de leche, it made a perfect dessert. I can only imagine that a fruit compote on top would be spectacular as well. 

If, like me, you don't have the patience for traditional cheesecake or if you've been intimidated by the usual process (or if maybe you've angered the baking gods and have had multiple failures), I highly recommend giving Basque burnt cheesecake a try. It will make a superstar out of any novice and you can save the angst for something more deserving. 

Rocher

Think back to your childhood. When a box of Pot of Gold chocolates was opened at Christmas, what piece did you go for first? A caramel perhaps? One of the flavoured creams? Maybe the large solid piece in the centre? All good options, to be certain, but my go to was the coconut cluster in the little paper cup. I loved it. The sound of the paper being peeled away from the chocolate. The crunchy texture of the coconut combined with the creamy milk chocolate. Perfection.

Nut clusters are the unsung heroes of chocolate assortments. While truffles and caramels and creams are more technical to produce and much beloved for their smooth centres, it's the nut cluster that that dares to be different and provide the contrast in a collection. Most years, I've included one in my own Christmas boxes for this very reason. A cashew cluster, a peanut and raisin cluster, a craisin and pistachio cluster, a coconut cluster -- they've all been delicious. And, conveniently, they are incredibly easy and fast to produce. 

As it turns out, the fancy term for a nut cluster is rocher. I learned this tonight while reading Greweling's Chocolates and Confections. Certainly, I've heard and seen the word before (we're all familiar with the famous Ferrero Rocher), but I never gave it much thought or looked for a definition before. Rocher is the French word for boulder or rock. And, when you think about it, a mound of nuts held together by chocolate does give the appearance of a boulder or rock.

As I continued my reading, one of the rocher flavour combinations suggested was macadamia nuts and crystallized ginger. Frankly, that sounds divine to me. As a dried apricot lover, I can't help but wonder if they would be good paired with almond slivers. So many options, so little time!

What fruit and nut flavours would you combine? 

Dulce de Leche Espresso Hearts

During the reorganization of my chocolate supplies a few weeks ago, I found a heart mold that I had purchased during my professional chocolatier program but never used. With Valentine's Day quickly approaching, it seemed like an ideal opportunity to test it out. And then after reading through ganache recipes one Tuesday night, I was inspired to try making a milk chocolate heart filled with dulce de leche and espresso ganache.

I chose milk chocolate for a few reasons. First, I have a lot of it because I primarily use dark chocolate in my production. Second, because I gravitate toward dark chocolate, I don't have enough experience tempering milk chocolate. As well, I haven't employed the piping bag method of shelling chocolates using milk chocolate. Guaranteed to be more tricky than dark chocolate, I wanted to try it. And practice does make perfect, right?  

These dulce de leche espresso hearts were a multi-step process: decorating the mold, shelling, piping the dulce de leche layer, piping the ganache layer, capping, and packaging. I spread these out over two weeks partly to make it more manageable and partly because I didn't realize how close February was and didn't buy cream with my groceries (and after 16 hours of writing spread over two days, I just didn't have it in me to run out to the store). 

Session One: Decorating and Shelling

I began by tempering some coloured cocoa butter to decorate the mold. Now, I just have to say that I was thrilled to finally try this again, since I hadn't done it in years. I purchased gold Roxy & Rich cocoa butter back in December when I replenished my dark chocolate supply. I've wanted it since 2018. And now it is mine! (My precious...)

Tempering coloured cocoa butter is easy. It just requires patience. You remove the cap from the bottle and pop it in the microwave for 10 seconds, then remove it and shake. Then another 10 seconds, remove, shake. And another 10 seconds, remove, shaky-shake. You get the picture. You progress in this fashion for about 1 minute and thirty seconds and eventually some of the cocoa butter melts while some of it remains solid. And by shaking, you ensure the temper of the cocoa butter. 

I dispensed a small amount into a pinch bowl, rolled a latex cot over my finger (thank you Shoppers Drug Mart), and then finger painted the molds. I decided to swipe only once from top right to bottom left, and in less than a minute I was done. The encouraging part of it all was that the gold cocoa butter began to solidify almost immediately, so I knew it was in temper. 
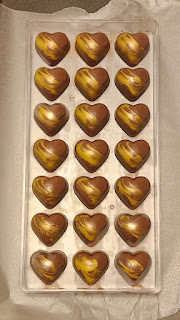
Next, I tempered 350 grams of milk chocolate and filled a piping bag. Using the "human depositor machine" method, I filled each heart, tapped the mold to remove air bubbles, and then inverted the mold to let the excess chocolate drain out onto a piece of waxed paper. Then I placed the mold on a tray in the fridge for 10 minutes. Now, I didn't quite get all of the air bubbles out and the shells are a bit thick in spots, but I was happy with the results nevertheless. It's a much cleaner way of working and in the future if my chocolate is just a little warmer and I tap it a little longer, I think I can solve the issue of it setting too quickly. (Yes, this means there will be more milk chocolate bonbons molded in the future.)

At this point, I set the shelled mold aside to await the next steps. 

Session Two: Layering Dulce de Leche and Espresso Ganache

The second production session occurred on a Sunday morning, passing the time during snowmageddon. I started by making a small batch of milk chocolate espresso ganache, so that it could cool while I was piping the dulce de leche layer. I measured heavy cream, butter, espresso powder, and milk chocolate into a bowl and went the old-fashioned bain marie route to melt it all together. About 10 minutes later, I had a beautiful ganache. I removed it from the heat to cool. 

Next, I poured my dulce de leche into a piping bag. With right hand applying pressure by squeezing the bag and left hand controlling the flow by pinching about a half inch above the opening, I very slowly deposited a small amount of dulce de leche into each heart. The dulce de leche was very fluid and shouldn't set while inside the chocolate, so the hearts should ooze when bitten into. 

Then I checked the temperature of the ganache. While it was starting to set, it was still 37 degrees -- far too hot to pipe into the mold because it could take the shell out of temper. I gave it a good stir and left it for ten minutes. Still too warm when I checked it, I left it for another fifteen minutes. When I returned, it was at 27 degrees, so I knew it was safe to pipe. 

Using the same method as for the dulce de leche, I quickly piped the ganache over the first layer. This part was tricky. To avoid the heavier ganache sinking through the dulce de leche and creating a total mess, I had to pipe at an angle across the surface of the dulce de leche faster than it could ooze upwards. For the most part, it appears to have worked well. With a toothpick, I knocked down any ganache peaks that were high enough to impede capping. Then I left the ganache to fully crystallize on top of the dulce de leche. 

Session Three: Capping

Still snowed in, the third session occurred early on a Tuesday morning. I gathered my supplies (chocolate, a silicone bowl, a piece of acetate, and a drywall knife), and prepared myself for capping. It can be tricky business and it's critical for shelf-life.

First I tempered a small amount of milk chocolate (but also about 4x more than I needed). After two temper tests to ensure it really was going to set properly, I spooned three lines of chocolate onto my mold -- one at the top of the mold, one along the second row of hearts, and one about half-way down the mold. Then I lined up the edge of the acetate with the edge of the mold and scraped across the full mold with the drywall knife. I've tried this method several times, but this was the first time that I got the right amount of chocolate on the mold. After admiring my work for a brief second, I cleaned up the edges (and snapped a photo) and put the mold into the fridge for 13 minutes.
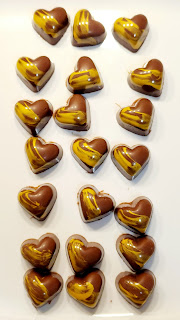
Next, I inverted the mold onto a tray and lifted it to see if any would fall out on their own. None did. In the past, I have tapped the edge of the mold on the counter to release the chocolates, but inevitably a few (or many) would come out cracked as a result (I guess I was probably tapping with too much force). So, instead, this time I tapped the mold with a wooden spoon, as I had seen in an Instagram reel by Kate Weiser Chocolate. Sure enough, one by one, the hearts dropped cleanly from the mold. And when I moved aside the mold and spoon to assess my work, I was absolutely thrilled. The shine on the chocolates was incredible. 

Session Four: Packaging

A few days after finishing these hearts, I checked my stash of packaging and confirmed what I already knew: I didn't have anything suitable for single chocolates. I have a large quantity of 2-piece and 4-piece boxes, as well as a variety of cellophane and paper bags. Alas, nothing for one piece. It was time to get crafty.

And so I went onto the Silhouette Design Store to look at cut files for boxes. Eventually I found a simple triangular box that should work. I downloaded it and began manipulating it to get the right size and fit as many on a single piece of cardstock as possible. After a few tests, I cut one dozen boxes and assembled them.

I popped each chocolate into a mini cupcake liner (so that the chocolate wouldn't come into contact with the cardstock that I used) and then carefully slid one into each box. I folded down the flaps and closed the boxes with heart stickers. Then I put them in an airtight container to await their delivery. 

Final Thoughts

As I finish writing this blog, I haven't tried one of my dulce de leche espresso hearts yet. I've tried all of the components, but I won't know how they work together for certain until sometime next week when I permit myself to indulge. But I can say that I'm very pleased with how they came together. The design is precisely what I envisioned, the milk chocolate is in perfect temper, and thanks to new production techniques the work was more controlled and cleaner. And this is the first time ever that I've had all pieces completed in sellable condition - no major bubbles, no marred finishes, no cracks, and no bloom. 

In short, I'm thrilled.

Happy Valentine's Day or Galentine's Day or Whatevertine's Day! 

Any excuse to eat chocolate, am I right?


Antique Sideboard Glow Up

Over Christmas break, I thought a lot about the need for a better storage solution for my chocolate supplies. As my collection of molds, flavourings, colorants, and tools has grown, I've tried a variety of solutions. First there was a cute blue rolling cart that I found in the trading area of my building. Then when I moved my baking supplies into a new cabinet, I repurposed the Rubbermaid cart for molds. Soon there was a pile next to these carts and everything started looking cluttered.

And so I spent some time over Christmas looking at options available to me. There wasn't much in stock at Canadian Tire or Home Depot, and what was available seemed expensive given that it's made of MDF. I considered ordering from Amazon, but then worried about it arriving damaged (or it being dropped in the lobby while I am at work). As much as I would love a trip to Ikea, I knew I wasn't likely to do that before the spring. 

I started contemplating the secondhand options in town and then did something I never do -- I looked at Facebook Marketplace. I quickly found a number of listings for sideboards at a used furniture store in a nearby community and decided to make the pilgrimage there for when they opened the next day. 

When I arrived, they were loading furniture onto the truck and they commented that if I picked out something in the next 20 minutes, then they would deliver it the same day. No problem, I thought, as I strolled around. I walked the perimeter and stopped in front of an antique sideboard unlike any other in the showroom. "I'll take it." The guy was a bit dumbfounded by how quickly I made the decision, but then flipped the sign over to SOLD without missing a beat. (I also picked out a new chest of drawers for my bedroom to replace a collapsible, cloth wardrobe.) I quickly paid and then headed straight home to clear a path for the sideboard that would have to roll past the Christmas tree and presents. Two hours later, it was in place. 

Now, this tiger oak wood sideboard needed a little love. The spindles holding up the top shelf were spinning freely and had to be toenailed into place. The mirror was rattling with every movement and needed the wooden backing put back into place. A few pronounced scratches needed to be coloured with a wax pencil and furniture marker. The molding along the top shelf had to be glued and clamped into place. The drawers required some shelf liner and one needed a cutlery tray to be functional. My boyfriend and I (but mostly my boyfriend) tackled each task over a two week period while waiting for new pulls to arrive.

You see, a few of the wooden pulls were missing and broken. And while it was tempting to try to match the originals, I had in my head that it needed a bit of an art deco vibe with glass drawer knobs. Green glass drawer knobs, to be exact. They couldn't be procured locally, but Amazon was happy to bring the world to my door. We struggled to install them because each section required a different length of screw, but we persisted. And I'm glad we did. 

One last piece that bothered me was that only one of the three keyholes still had its brass plate. If I could, I wanted to replace those as well. I had little luck with my searching until I discovered the term "escutcheon," which according to Google is "a flat piece of metal for protection and often ornamentation, around a keyhole, door handle, or light switch." Who knew? Armed with that term, I quickly found what I was looking for and ordered them. The installation was tedious, but not difficult. We completed the three over a 2-day period. And when I say we, I mean my boyfriend carefully widened the keyholes with a hand file until the escutcheons fit. He's been a great partner in the glow up of this sideboard. 

The storage space inside is incredible. All of my chocolate molds fit in the bottom drawer. The left side of the middle section contains all of my chocolate supplies, while the right side is now storage for board games. The top left drawer contains my Aunt Mona's cutlery, making it much more accessible for entertaining. And the right drawer contains some seasonal stoneware.

It will take some time to decide exactly what to put on top of the sideboard, since the mirror will reflect everything, but for now I'm loving this as the home for my green glass decanter, a gift many years ago from my late Aunt Rosella and Uncle Mike. A treasure from our antique and flea market days in the late '90s, this Italian blown glass piece features an ice chamber for chilling white wine. I have a few more pieces of green glass that may also suit the vibe. 

Until then, I couldn't be happier with this restoration. It feels like this sideboard was meant to be with me.

If you're curious, here's the before pic:


C is for Cookie

I've been a fan of Pinterest since it first started. And I've spent an inordinate amount of time on the site as its infinite scroll served up inspiration for cupcakes and crafts. The height of my pinning was probably in 2015, when I had mono and spent three weeks alone in my apartment (which, in retrospect, was great training for the pandemic that followed five years later), but it's still my go-to for favourite recipes and new ideas. 

And so when I needed an idea for a friend's birthday treat this month, I turned to Pinterest again. I have a board titled "Baking and Dessert Inspiration," which seemed like a good place to start. As I scrolled, I was reminded of various treats I've made over the years -- a giant peanut butter cup, a Battenberg cake, a Robin Hood-inspired archery cake, a peanut butter layer cake, polar bear cookies... And I found a few ideas that I had forgotten. Like Cookie Monster Oreos.

Sandwich cookies dipped in colourful candy melts had a moment about six or seven years ago. Maybe a little longer. The designs were very creative. One of my favourites was the polar bear faces that used smarties for the ears and nose. I also thought the frogs, complete with sour candy tongue and pretzel legs, were adorable (and they were a hit with the recipient). Adding eyes and a mini chocolate chip cookie to make Cookie Monster? Brilliant.

Armed with Pinspiration, last Sunday I set off to buy a small package of Oreos at Dollarama, and then popped into Bulk Barn in search of blue candy melts. Unfortunately, there were none left, so I decided to colour white candy melts with some oil-based food colouring. I also picked up blue sanding sugar and a small bag of miniature chocolate chip cookies. 

A few days later, I pulled together my supplies and grabbed candy eyes from my stash. I cut the mini chocolate chip cookies in half, paired up eyes, opened the bag of sprinkles, and melted the candy coating. Then I added some (okay, a lot of) blue food colouring and a few drops of black. Stir, stir stir! Next I dipped an Oreo in the candy coating, pressed half a cookie into the mouth area, added the eyes, and sprinkled the blue sugar on top. 

I stood back to critique my work. Cute, but not quite right. The straight edge of the chocolate chip cookie didn't quite align with the curved side of the Oreo, and so it looked a bit off. 

I grabbed a paring knife and carefully shaved away some of the cookie, creating more of a crescent moon shape. And voila! 

Lather, rinse, repeat! Before I knew it, I had a set of Cookie Monster Oreos lined up like little soldiers, ready to go in the fridge for 10 minutes to set. 

Am I happy with the results? You betcha! They are cute and they taste great. Who wouldn't love a Cookie Monster Oreo? They're the perfect birthday surprise for a friend. 

And, upon reflection, dipped sandwich cookies need to make a comeback. 


Discounted Chocolate

How many of you wait until the day after Valentine's Day or Halloween (or any holiday for that matter) to buy discounted chocolate? Maybe you go for a box of Turtles, or a bag of Lindt truffles, or the can of Quality Street that you couldn't afford before Christmas. Almost always, it's industrial chocolate that you're buying. And to be clear, there's no judgement here. Industrial chocolate is delicious. (I'm looking at you, Reese peanut butter cups.) It's not normally ethically sourced, single origin chocolate made by a small business.

So you can imagine my surprise last weekend while strolling through the clearance section of Michaels (of all places!) when I saw a small box of chocolates that was now 70% off. I noticed that the label referred to "farm to bar chocolate" and thought it interesting. The brand, Truffle Pig, sounded vaguely familiar, but I couldn't place it. After confirming the price of a mere $2.10 at a self-serve scanner, I decided whatever they were, they were worth it. 

I have to admit, I was a little confused to have found this chocolate at Michaels. I spend a fair amount of time browsing there. I'm familiar with the horribly overpriced industrial chocolate and other snacks near the cash registers. Despite being at Michaels several times before Christmas, I don't recall having seen these anywhere in the store. Their sudden appearance after Christmas is a bit of a mystery to me. In any event...

Truffle Pig Chocolate is based in British Columbia. A woman-owned business, it is focussed on ethical chocolate that is sourced in fair and sustainable ways. A box of five truffles (aka piglets) can be purchased from their website for $6.00 and chocolate bars start at $3.75 each. These are already reasonable prices!

One of the things we liked about them immediately was that each truffle is individually wrapped. Now, admittedly, this does increase the amount of packaging (and is the type of wrapper that can't easily be recycled) and so is less sustainable from that perspective. But it does ensure the freshness of each piece when eaten over a longer period of time.

Ok, let's be honest, you can easily eat this box in one sitting, but as I write this I'm proud to report that four days later, there are two piglets left. (No promises on how much longer they will survive...)

The colourful packaging is appealing and clearly identifies the various flavours. And it features their very recognizable, happy pigs. (Why pigs, you ask? Because pigs are known to be truffle hunters -- the fungus variety, not the chocolate.)

Made with single origin chocolate from Nicaragua (you can meet the farmers here), these truffles are delicious. When I've tried other single-origin chocolate, I've often been surprised by the fruity or floral notes, but these, to me, had more of an earthy undertone. The chocolate is smooth and has just the right amount of sweetness. The peanut butter and hazelnut centres were beautifully balanced and the piglets were, quite frankly, cute.  

So, here's to discounted ethical chocolate and discovering it in unexpected places! And if you have the opportunity to purchase Truffle Pig Chocolate in the future, regardless of the price, it's entirely worth every penny. 


Repairing Ganache

Some of you may recall that last year I had a rather epic fail in my kitchen, when I made an orange white chocolate ganache to fill Easter eggs. I was baffled by it at the time and none of the salvage tips I could find online actually worked well enough for me to use it as planned. This week while continuing my chocolate reading, I found the explanation for what occurred and, more importantly, how to fix this issue in the future. 

According to Greweling, "A ganache that requires the addition of liquid to re-emulsify it is too high in fat. Its formula should therefore be adjusted for future batches" (Chocolates and Confections, p. 95). Now that I think about it, the white chocolate ganache I made, flavoured with orange oil and made with butter in addition to cream, definitely had a higher fat content than is the norm. Adding more cream and more melted white chocolate did nothing to fix the issue because those additions didn't improve the ratio of fat to water. Had I added milk or even water, I might have had a different result and more success in repairing the broken ganache. And when I remade the ganache the following day, I essentially did reformulate the recipe, because I used less butter and more cream, which in turn altered the ratio of fat to water. Heavy cream has a fat content of about 35%, while butter has a fat content of about 80%.  

The idea that a ganache could have too much fat has never been on my radar. Too much water, sure -- that would shorten the shelf-life. But too much fat? 

Usually when we talk about ganache, we talk about ratios of chocolate to cream (or whatever else is being used to soften the chocolate). Milk chocolate requires half as much cream as dark chocolate to achieve the desired effect and white chocolate requires half as much cream as milk chocolate. So the ratios we were taught really weren't expressed in terms of fat content, but in terms of the type of chocolate. When making ganache, it's not uncommon to substitute alcohol, butter, or even water for some or all of the cream, complicating things further. And while I've noticed that alcohol in a ganache causes it to behave differently, I simply attributed it to some characteristic of the alcohol and not specifically a change in the fat to water ratio. 

Once you deviate from a traditional ganache recipe, it seems, you have to pay attention to the fat to water ratio. Lesson learned. 

I also learned another interesting tidbit during this week's reading. Not enough to warrant a blog post, but fascinating nevertheless. I already knew that starch molding is a common method of making fondant, jelly, and cordial centres that are later enrobed in chocolate. I was first introduced to this confectionary technique while watching the YouTube videos of Hercules Candy. You press shapes into cornstarch (or another starch mixture), deposit liquid centres into the wells, leave them to crystallize, and then remove them from the starch mold to be covered in chocolate. But did you know that starch is flammable‽ (Yes, I just used an interrobang. It seems appropriate in this context.) Greweling cautions, "Should a large quantity of [starch] become airborne and be exposed to an open flame, the result could be a flash fire or explosion" (p. 90). 

While I'm all for experiential learning, I'm happy to acquire this knowledge by reading instead!