Chocolate Intentions

It's that time of year again when many people reflect on the past year and make resolutions for the next. Personally, I stopped making resolutions several years ago for a few reasons. First, too often we associate resolutions with deprivation -- some of the most common involve eating less or giving up particular "vices." Second, while today no doubt marks the end of one year and the start of the next, I've always felt that Spring, with trees and flowers coming alive and the return of birds and squirrels, as well as September, with the excitement of the new academic year, were just as important (perhaps more important) periods of renewal. Finally, let's be honest, without a plan, resolutions are destined to fail. 

And so for the last few years, instead of making resolutions, I make a list of things I want to do or accomplish in the next year. Instead of resolving to do less of something, I make a list of intentions that are about doing more. Sure, my list from time to time has included eating more vegetables or moving more. But one year I decided to eat more cheese and let me tell you that I had a great year selecting a different cheese each week to add to my lunch bag. Sure, people laughed when resolutions came up in conversation and I revealed that I was planning to eat more cheese, but I'm willing to bet I was far more successful in my endeavour than they were in giving up sugar! (Incidentally, if you haven't tried Coeur de Lion mini soft cheese, you're missing out.)

Since I enjoy baking and cooking, my list of intentions invariably includes a few recipes that I want to try. Often these are more time-intensive or complicated recipes, like Julia Child's boeuf bourguignon. But sometimes they are simple, like Cincinnati chili. (I recommend both.) My list also includes crafts I'd like to make. Last year, this meant M&M Christmas ornaments were on the list -- and I was particularly pleased with how they turned out!

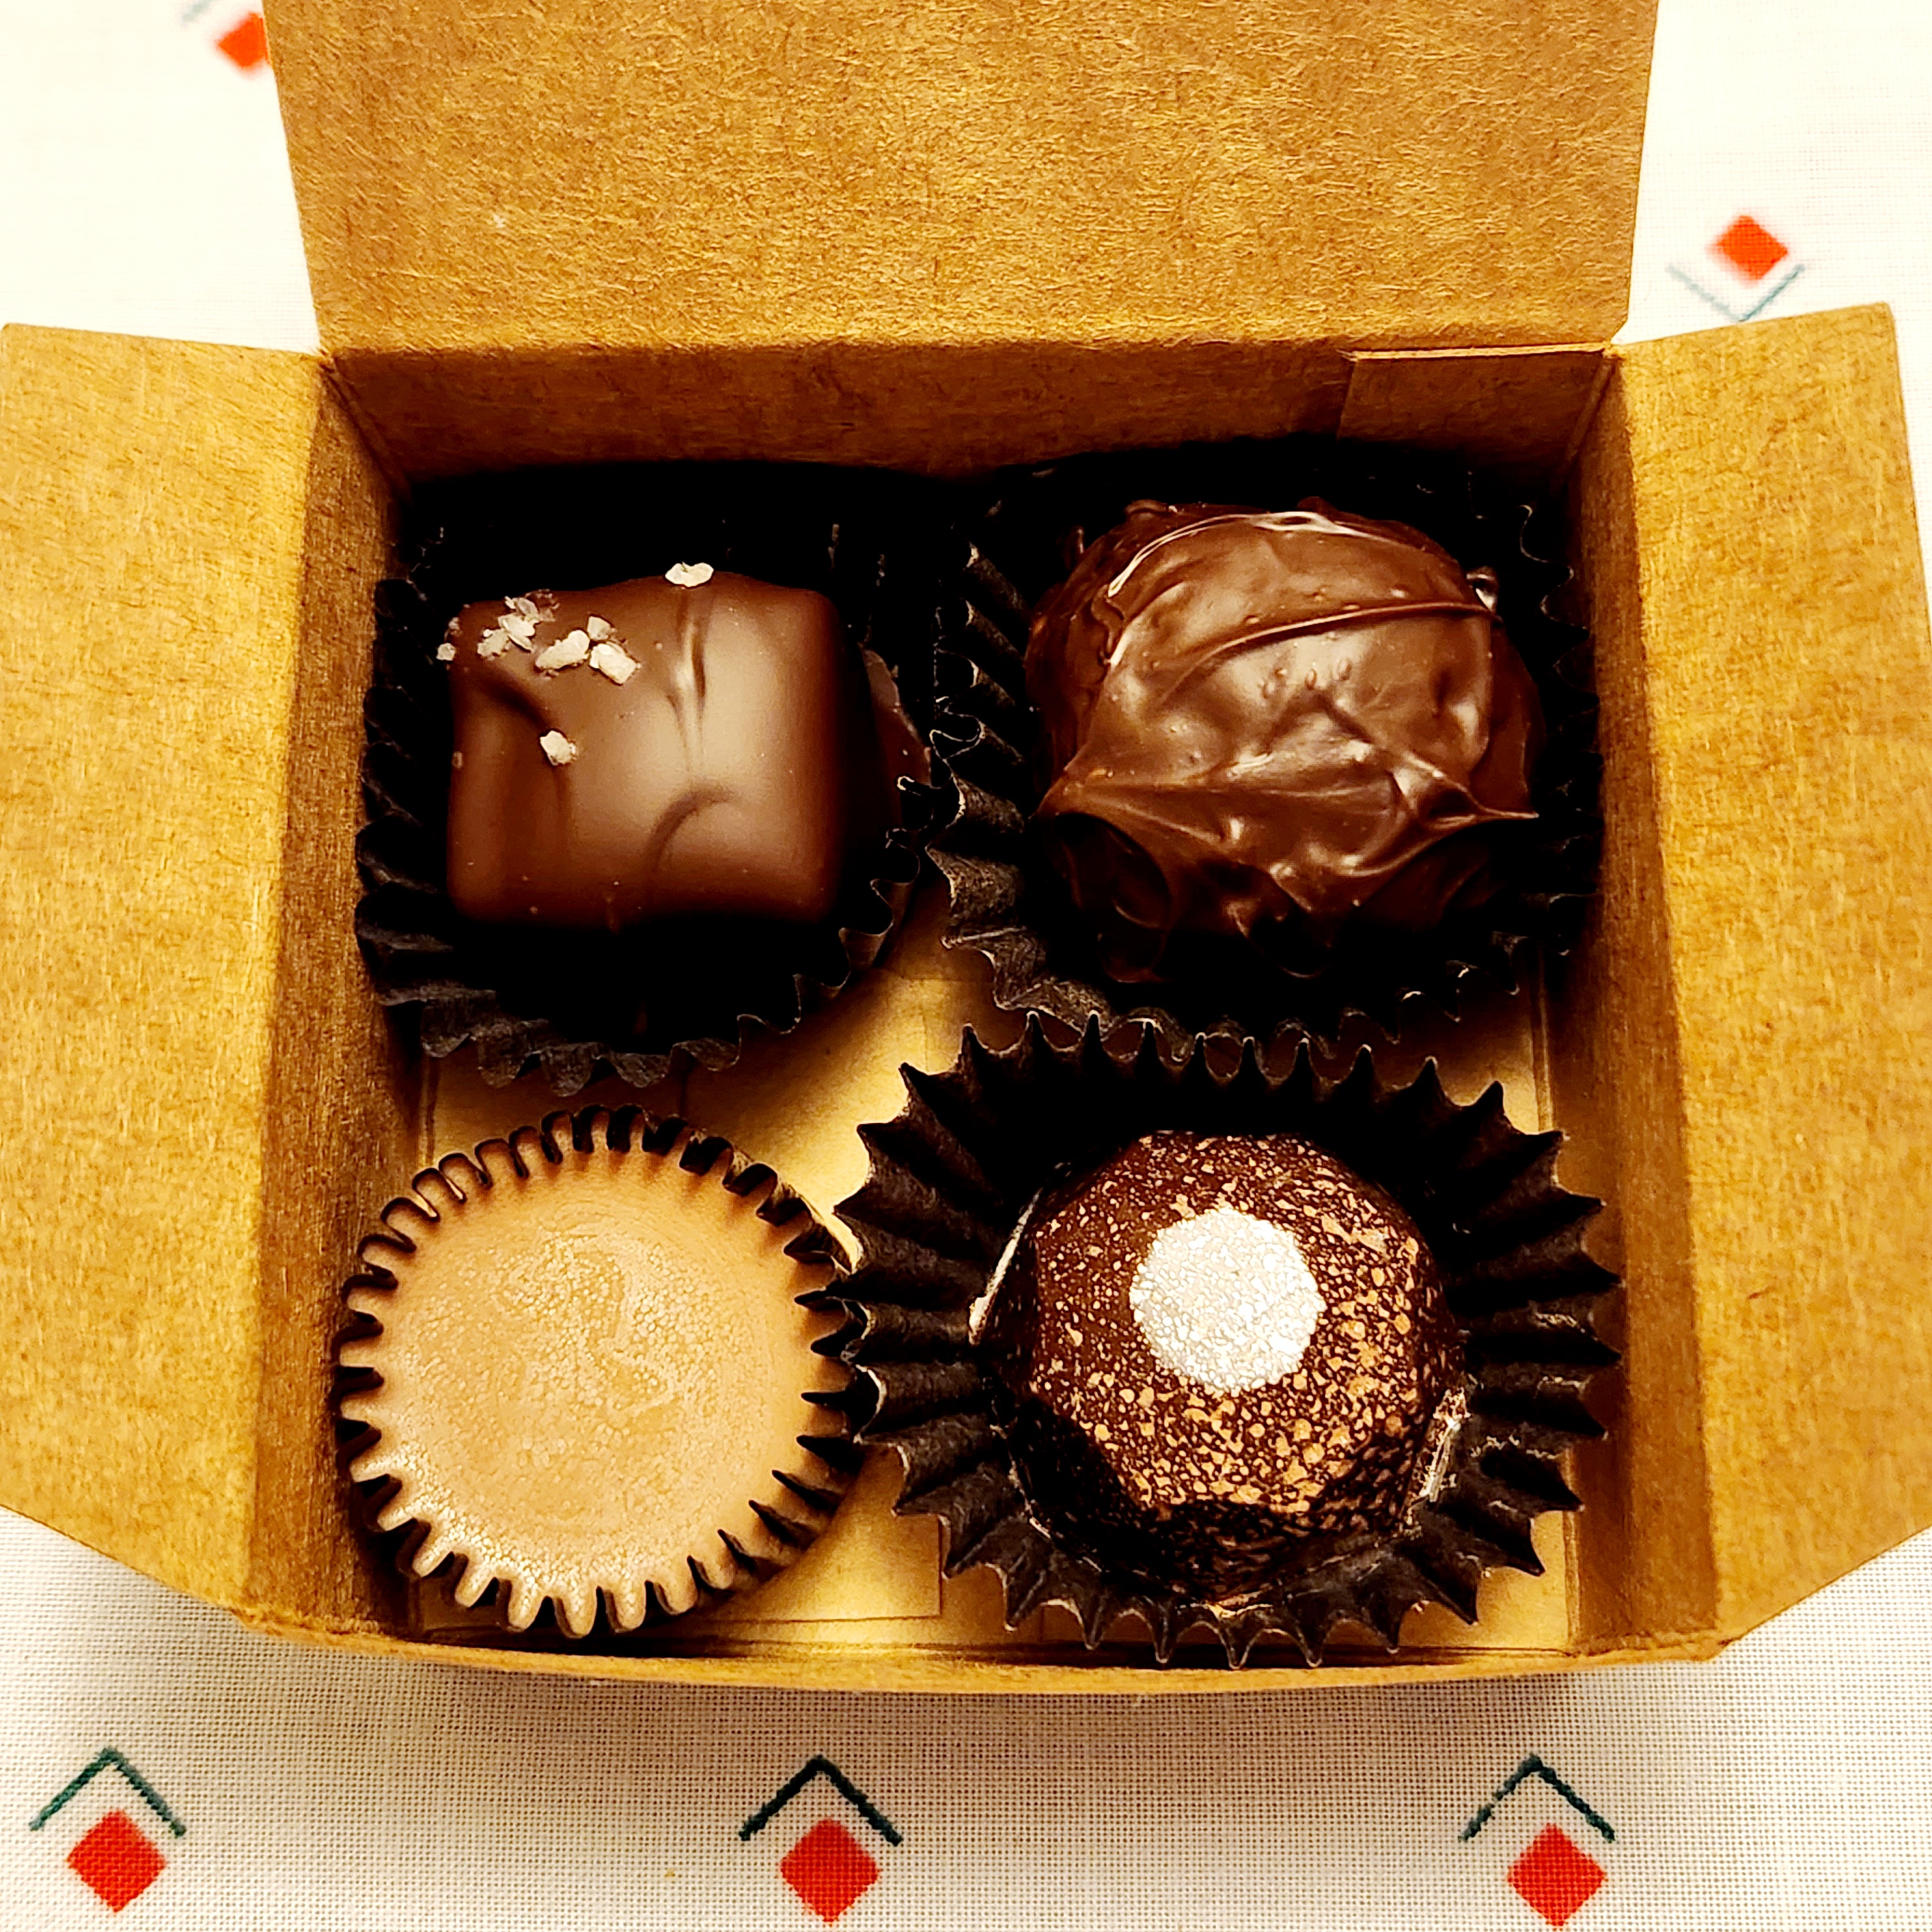
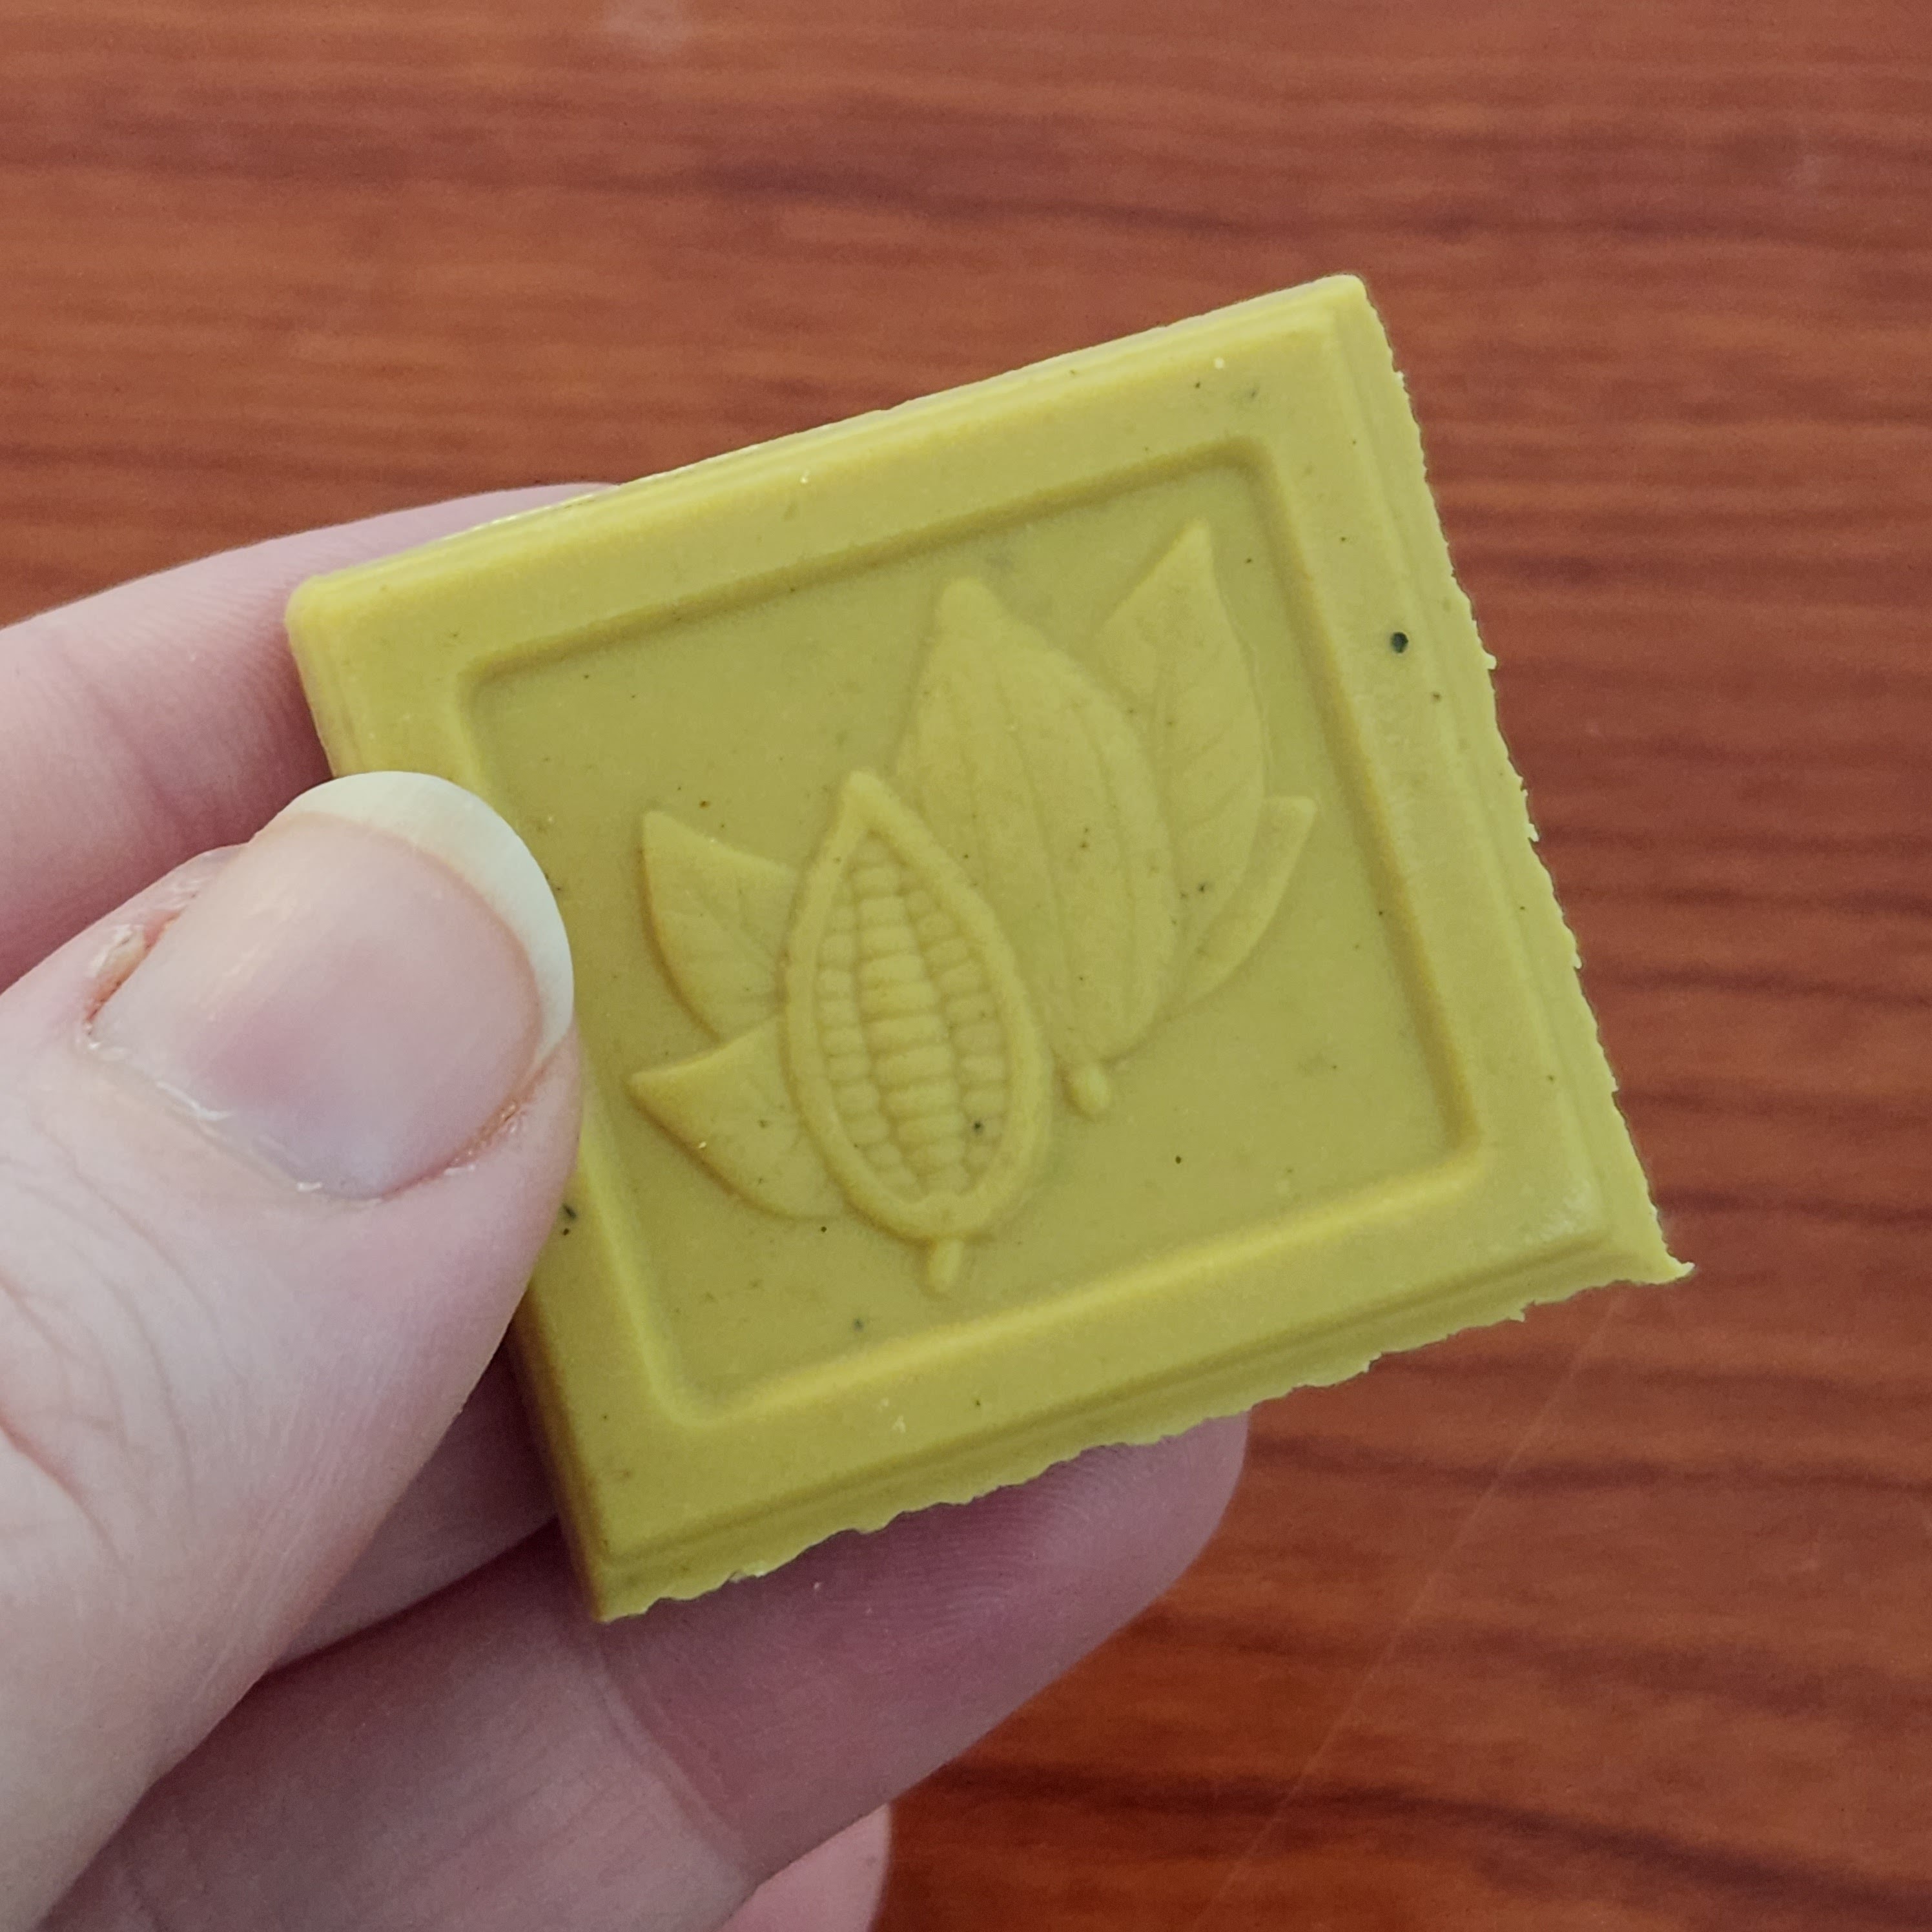
Of course, as those of you reading this blog know, I also started 2023 wanting to spend more time on chocolate, to advance my skills and try new recipes and methods -- and, as a result, I think this year's chocolate assortment was my best work yet. That didn't happen by accident, but by plan. I supported my intention by setting aside time in my schedule. Tuesday evening became "chocolate night." I made this intention known to family and friends. I decided that I would use this blog as a way to hold myself accountable. And when necessary, I purchased the tools and ingredients to advance my practice (a chocolate stencil, citric acid, artisanal chocolate). Consequently, it's been a great year. I enjoyed my quiet evenings of study, I can see improvement in my work, and I feel a sense of accomplishment. Many in my circle have been very encouraging and supportive of this endeavour, and I appreciate that more than words or gifts of chocolate could say. 

And so what's next? 

There's no question that my intention of "more chocolate" will remain for 2024. In fact, I've already replenished my dark chocolate stash and purchased an ingredient I've been wanting to try for five years! While I still expect to observe "chocolate night" weekly, it may become a little less rigid to accommodate other intentions, like making "Basque burnt cheesecake" that I saw on Crime Scene Kitchen (though I suppose I could make a chocolate sauce to drizzle over it and maintain the chocolate connection!). I'd like to bake bread more often as well, since there really is no comparison between homemade bread and store bought. I'm thinking that Soup January may be a good opportunity. (Incidentally, Soup January started a few years ago as an intention to eat more vegetables after the excess of the holiday season, but has become a tradition that I look forward to every year.) 

I have also decided that 2024 is the year that I will learn to service my sewing machine. I've had it since I was about 14 years old and it's never been properly cleaned or oiled. I'm determined to acquire this skill and show my sewing machine the love it deserves, if only motivated by the fact that a basic service costs in excess of $100 now (!). In the spirit of setting myself up for success in this regard, I've located and saved a video tutorial on YouTube, brought my grandmother's vintage Singer oil applicator back from Newfoundland, and ordered a bottle of sewing machine oil which should arrive by Old Christmas Day. Wish me luck! 

As for this blog, I hope it will continue and that you'll indulge me when the topic strays from chocolate to other endeavours. 

I'd love to hear what your intentions are for 2024. Until then...

Best wishes for the New Year!

Christmas "Crack"

How many of you make Christmas "Crack" at this time of year? 

Most commonly it's made with a layer of saltine crackers covered in caramel (or toffee) and topped with chocolate. A number of variations exist, employing Ritz crackers, pretzels, or graham crackers as the base. Some people add sprinkles or chopped nuts to the chocolate layer, while others drizzle with white chocolate to decorate. Regardless, the end result delights the senses: sweet and salty, crunchy and creamy. It's very more-ish. 

My sister and I have made this a few times now, after finding a recipe on Pinterest. We've had mixed results. The first year, the caramel was more firm, but the second year it was very soft, sticky, and gooey. Both years, the treat had to be kept in the fridge to ensure the chocolate was set. 

As a chocolatier, I find the recipe to be infuriating, since it isn't written to promote success. It doesn't give the temperature to which the sugar should be cooked, and the method of applying the chocolate ensures it will not be in temper (and therefore will not properly solidify without refrigeration). And if refrigeration is necessary to keep the chocolate firm, then the caramel layer will get stickier and stickier, as the sugar (which is hygroscopic) attracts and absorbs moisture from the fridge. 

Now, maybe that's ok. Maybe people want more of a soft caramel than a toffee atop the crackers. Maybe people like the stretchy, sticky "caramel" layer? (My mother said she prefers it this way.) Maybe chocolate melting on your fingers as you break it apart is ok? (It's certainly tasty.) But if that's not what you're looking for, then read on!

There are so many recipes floating around the internet that it can be difficult to know which ones are good and which ones won't turn out. When it comes to Christmas "Crack," if it doesn't require you to have a candy thermometre (or tell you how test which cooked sugar stage you've reached), then you have to accept that the result will be hit or miss. This is basic science. The temperature to which sugar is cooked will determine its crystal structure -- the higher the temperature, the more firm it becomes. Cook it to soft ball and you've got a soft caramel or fudge texture, firm ball and you've got something more like a firm caramel or nougat. To achieve a snappy toffee or brittle texture, the sugar has to be cooked to hard crack -- and that can't be reached by boiling the sugar for only 30 seconds as our recipe indicated, nay, warned us not to surpass. (I admit, I ignored this warning and let it boil a few minutes longer than recommended, though I resisted the urge to break out a thermometre.) All to say, before you make your crack, it's worth considering whether you'd prefer a chewy caramel or crunchy toffee texture, and look for a recipe that supports that goal. 

Regarding the chocolate, some recipes tell you to sprinkle the chocolate over the top of the hot pan when it comes out of oven, while others tell you to melt it in the microwave and then spread it over the top. In either scenario, if you're using real chocolate, it will come out of temper (even if you melted it the right way to maintain temper), because the temperature is just too high. It will require refrigeration to solidify and it will likely experience bloom. You could let the crackers and cooked sugar cool for a few minutes before adding the chocolate (which is what we did), and as long as the chocolate was melted in a way that maintained its temper, then it will solidify at room temperature within about 5 minutes. (The way to do this is to melt the chocolate in the microwave in short bursts at 50% power (20-30 seconds each, stirring each time), stopping while there are still pieces of chocolate remaining, and letting the residual heat melt out those remaining pieces while stirring.) You'll have chocolate that doesn't melt when touched, can be kept at room temperature, and has a sheen to it (if that's your goal). Thus, before making your crack, it's worth considering whether you'd rather store it at room temperature or if you have room in your fridge to keep it, and proceed accordingly. 

It's worth pointing out that putting tempered chocolate atop toffee isn't without its own challenges. Sometimes the chocolate will separate from the toffee layer (I've experienced this after making almond roca). As a result, some chocolatiers choose to top toffee with melted chocolate (not tempered) because it will adhere better, but then sprinkle nuts over the top to hide the inevitable bloom that appears. There's no right or wrong here -- it's a choice to be made. And no one will fault you for more sprinkles or nuts!

All this said, the most important decision, in my opinion, is whether to make it or not, because, despite this blog post, if you choose to make Christmas "Crack" you really can't go wrong. Whether the toffee is chewy or brittle, whether the chocolate is tempered or not, the end result is delicious -- nay, addictive.

Tell me, have you tried making Christmas "Crack"? How did it turn out? 

Happy holidays everyone!


2023 Christmas Assortment

Now that the majority of the boxes have been delivered, I can blog more specifically about this year's Christmas assortment!

For 2023, I made 30 four-flavour boxes, up from last year's 24. This was deliberate on my part, since I had planned to offer a few up for sale on Facebook for those who don't normally get to try my chocolates. Thanks to slightly larger batch sizes for two of the recipes, I also unexpectedly had enough pieces to pack 12 two-flavour boxes, half of which I also intended to sell. Unfortunately, my plan was foiled last week when my travel itinerary abruptly changed due to weather and I left for home two days early. I handed out the extra four-flavour boxes to individuals in the hall before leaving campus and tossed the six remaining two-flavour boxes into my carry-on to give out at our annual Crappy Craft Night

The four-flavour box included a salted caramel enrobed in dark chocolate, an orange cardamom truffle hand-rolled in dark chocolate, an apricot brandy praline with a dark chocolate shell, and a milk chocolate peanut butter meltaway. The salted caramel featured Sonoran sea salt, given to me by a friend who lives in Arizona. The orange cardamom truffle was prepared using whole cardamom pods, given to me by another friend earlier in the year. The peanut butter meltaway contained no special ingredients, but was a departure from the usual mint meltaway (and I think it would make a delicious filling in the future). But the really special creation this year was the apricot brandy praline.

A nod to my grandmother, who was known to keep a bottle of apricot brandy in the crisper drawer of the refrigerator, this praline has been in the works since January. It was then that I decided I would try a layered bonbon, initially thinking I would pair an apricot brandy ganache with a layer of marzipan, since I love the combination of apricots and almonds. In July, while in Newfoundland, I purchased a bottle of apricot brandy, since it doesn't appear to be available in any Nova Scotian liquor stores (in comparison, NLC had several different brands to choose from -- obviously Newfoundlanders like their apricot brandy). By the fall, my thinking had evolved and instead of pairing the ganache with marzipan, I decided to pair it with apricot jam to brighten and emphasize the apricot flavour. Featuring a dark chocolate shell decorated with copper edible luster dust, the final product had a dollop of apricot jam encased in apricot brandy ganache. And while I only got to try one of them before packaging, I think the jam was the right decision to create a burst of flavour. I was thrilled with the results -- a true homage to Honora. 

After filling 30 shells with apricot brandy ganache, I found myself with enough ganache to make another 20 truffles, and so I piped and rolled and hand-enrobed those as well. They were paired with the remaining peanut butter meltaways to create smaller treat boxes. While the truffles hit a little different than the pralines, due to the absence of the apricot jam, they still pack a flavour punch. 

I'm very pleased with how this year's assortment turned out. I think it's some of my best work, not only in terms of the flavours, but also in terms of the execution. This is the first year that I've nailed the temper of my chocolate for every piece that I produced. And I finally feel like I'm getting the hang of hand-rolling truffles. 

Hopefully those lucky enough to receive these boxes enjoyed them. Chocolate made in truly small batch quantities is qualitatively different from that which is mass-produced. And every piece is a labour of love. 

The best things really do come in small packages. 


Transfer Sheets

It wouldn't be Christmas without chocolate bark, right? 

Every year, I make at least one batch of bark. I like to try different inclusions and toppings (though I'm not sure anything will ever top the milk chocolate potato chip bark from a few years ago). As I thought about the bark for this year, I was focussed on using up some leftover gingerbread. I've always tried to be creative to avoid food waste, but in these days of inflation and shrinkflation, "waste not, want not" hits a little different. Have you seen the price of butter and sugar lately? I digress...

And so I blitzed up 75 grams of gingerbread (which was baked to more of a gingersnap texture) and added it to 400 grams of tempered dark chocolate. The result? Eight bags of gingersnap bark for giving this season. 

But I did make one deviation from my normal method. You see, with all of this reading I've been doing, I was reminded of transfer sheets -- plastic sheets decorated with cocoa butter. Using a transfer sheet was one of many decorating options in my professional chocolatier program years ago and so when I bought my school supplies, I ordered three from Golda's Kitchen in Ontario (which sadly no longer exists). I used one sheet (gold swirls) when capping one of the bonbons in my assignments. I used another (hearts) pre-pandemic on some Valentine's chocolate bark topped with cinnamon hearts. Long forgotten in storage, there was one remaining sheet. I pulled it out and spread the tempered chocolate on it. 

The result?

My gingersnap bark may look like any standard chocolate bark from the top, but the bottom is covered in tiny snowflakes. Sort of the "business in the front, party in the back" of the chocolate world.

One day, I hope to have custom transfer sheets with my name on them like Kate Weiser for capping my confections. 

Until then, what's your favourite flavour of bark this time of year? 


Shelling Pralines

In the past few years, I've moved away from using molds when preparing chocolates for Christmas unless the piece is solid. This is because the process of "shelling," depending on which method you use, can be slow or messy. 

When I first started making chocolates as a kid, I used the method I had learned from my Girl Guide leader (which is also the method advanced in many Wilton tutorials, which might be where she learned it). Using a good quality paintbrush, you paint the mold with a layer of chocolate. Once it sets, you paint a second coat, paying particular attention to the areas where you can see light through the chocolate. Then you proceed with filling and capping. This is easy enough and can result in a very thin shell, but it is also very time consuming and depending on how intricate the mold is and how many you're doing, it can be a race against the clock to get the wells painted before your tempered chocolate crystallizes in the bowl. 

The method we were taught in the professional chocolatier program was to ladle chocolate into the wells of the mold, tap it a few times to release any air bubbles, and then invert it (either over parchment or a large bowl) and tap vigorously before scraping the excess off and leaving the shells to set. Obviously, this is a much quicker method, which is great for production, but it can be tricky to figure out how to hold and manipulate the mold the first few times you do it and it's messy.

It wasn't until last week that I tried the third method. It was one that I remember seeing during my chocolatier training. In a video profiling a home-based chocolatier in British Columbia, we watched him pipe the chocolate into his molds. He said it was a cleaner way of working -- and it certainly seemed that way. In essence, he had turned himself into the human equivalent of a depositor (which is used in larger scale production of chocolate). 

The night before I planned to shell my molds, I decorated them with luster dust. Because the luster dust is mixed with alcohol to create an edible "paint," it requires a few hours to fully dry before the mold can be filled. 

The next day, armed with 400g of tempered dark chocolate, I filled a piping bag and deposited chocolate into each well of my chosen mold. Easy enough and very clean. I gave it a few taps on the counter to release any air bubbles, flipped it over, and tapped with the handle of my drywall knife as the excess chocolate drained down onto my counter (which had been covered with a piece of waxed paper). Then a quick scrape across the mold to remove the excess chocolate and the shells were ready to set! Easy peasy, right? 

While this worked perfectly -- and I do mean perfectly -- my next decision was the wrong one. Since I'm aiming for about 30 boxes of chocolates this year, I had a second mold prepared with the intention of shelling another half mold (each mold has 21 wells). I used my drywall knife to collect the chocolate from the waxed paper, returned it to the piping bag, and tried to shell another 12 wells. Now, the entire time I was doing this, a little voice in my head was saying, "This is a bad idea." But I did it anyway. And the result? I didn't shell my mold. I ended up with solid chocolate pieces. The chocolate had thickened to the point that it wouldn't drain from the wells, no matter how much I tapped. I ended up having to re-temper chocolate to make the additional pieces I needed, but they have no decoration because I didn't have time to paint them and let it set. 

Now, despite this hiccup, I definitely would use the piping bag method again. It was cleaner and it was relatively quick. In the future, I would just temper more chocolate or temper it in batches instead of trying to be efficient in the way I described. (Side note: If I had a large melter or even a large bowl of tempered chocolate that the excess was falling into, this wouldn't have been a problem; however, I work in very small quantities.)

As for the results, I'm very happy with how these turned out. There are fewer imperfections in the shell (no air bubbles to be seen) and look at that shine! It's like a mirror!

I definitely want to mold more pieces in the future as a result!

Meltaway Magic

Have you ever savoured a mint meltaway and wondered why it was such a magical experience? The answer is eutectics. 

A eutectic mixture is one in which the melting point of the mixture is lower than the melting point of its discrete parts. In the confectionary context, this usually refers to a mixture that combines two different fats (cocoa butter and coconut oil), which results in a melting point much lower than that of either cocoa butter or coconut oil. When the combined fat hits the palate, it quickly melts and disperses the flavour. 

Boom! The magical meltaway effect. 

Greweling observes: "The transition from a solid to a liquid state happens so quickly that it is possible to feel the heat being absorbed from the mouth. This is the reason that centers of this description actually leave a cool feeling on the palate as they rapidly melt" (Chocolates and Confections, page 411).

This cooling sensation can be amplified through flavouring, such as mint, which itself has a cooling sensation. I've also made wintergreen meltaways. However, the meltaway technique can also be used with nut pastes.

It's easy enough to make a meltaway from an online recipe like this one (which is based on a recipe in Greweling's book). While it is common to "slab" the meltaway and then cut it into pieces, I prefer to pour the mixture into candy cups and let it crystallize. For me, it's easier for handling and packaging.

These are one of the easiest things you could ever make and are perfect for gifting this time of year.

And, as an added benefit, you can discuss eutectics over a cocktail at your office Christmas party!


When I dip, you dip, we dip...

Dipping centres in chocolate is perhaps my least favourite task as a chocolatier -- and that's because it's tricky. If it can go wrong during enrobing, then I've experienced it. I've always struggled to avoid too much of a "foot" on the finished piece. I've also battled over-crystallized chocolate that clings to the dipping fork and leaves marks on the bottom of the chocolate. And as the saying goes, once bitten, twice shy. 

The viscosity of the chocolate, the temper, and the working temperature are all important factors in getting this right. Unless of course you're using compound chocolate or you're adding something like shortening to the chocolate to change the fluidity and/or the set -- but we don't do that around here! On top of this, a good working set-up is crucial so that the movements feel natural. And this is where this week's study has paid off. 

In the Greweling book, there is a diagram of the appropriate set-up for a right-handed chocolatier when dipping centres: undipped centres on the left, tempered chocolate in the centre (tilted toward the chocolatier), and an empty tray on the right to receive the dipped centres (which is filled from right to left). I decided it was definitely worth trying one more time before switching to another method like hand-dipping to see if I would have greater success.

I set up on my dining room table, with caramels on a tray to my left, a thick book directly in front of me, and an empty tray lined with waxed paper to my right. I set a small bowl of coarse sea salt at the back of the tray and got my dipping forks out. Then I tempered my chocolate. It was a little warmer than I normally work with, but when I did the temper test it started to set within 3 minutes, so I proceeded. I placed the bowl of chocolate in the centre, propping the back of the bowl up on the book.

I held the dipping fork in my right hand. With my left hand, I picked up a caramel and dropped it into the chocolate. Then, with the dipping fork, I flipped the centre and then picked it up with the fork, "tapping" the centre on the pool of chocolate a few times before moving it to the empty tray. (This tapping motion uses the surface tension of the chocolate in the bowl to pull any excess chocolate off the centre.) After every four centres, I paused to sprinkle sea salt on the corner of the caramels. Then I stirred my chocolate to ensure even heat throughout the bowl. For a few centres, I tried an alternative method of submerging the centre and swiping the chocolate across the top of it before lifting it out of the chocolate with the fork. That seemed to work just as well, but I quickly reverted to the flip method. I continued in this way until I had the full batch coated. 

Throughout, I was surprised by how easy it seemed to be. First of all, the left to right action just felt smooth and there was no reaching required. Second of all, the tilted bowl made a huge difference, even just in the ability to see the centre without having to lean over the bowl. Finally, that slightly warmer chocolate meant there were no issues of over-crystallization and the chocolate was fluid enough that a huge foot didn't form around the chocolate. And the technique of letting the surface tension of the pool of chocolate pull the excess off of the dipped centre worked better as well because of the fluidity.

The result? This may be my best dipping experience ever!

And the first of four flavours for this year's assortment is now done and dusted (or, more appropriately, done and packaged in an airtight container while awaiting packing).  


Chocolate Percentages & Temperatures

After five years of chocolate study and practice, you might think that during my reading of the Greweling chocolate bible (Chocolates & Confections), I'd skip over the opening chapters on the bean-to-bar process, equipment, ingredients, and tempering. I didn't. This week, I reviewed the second and third chapters and, while I admittedly did skim some of the familiar content, I read the vast majority of it because it's a good reminder of details that I may have forgotten. As a result, I also found two nuggets of new information.

The first was regarding chocolate percentages. I think we all assume we understand those numbers -- the higher the number, the darker the chocolate and the lower the number, the lighter the chocolate. But Greweling notes, "surprisingly few professionals seem to understand the number, its significance, or what it does and does not tell us about the chocolate" (p.35). Well, okay, Peter, you've got my attention!" 

Greweling goes on to explain that the number tells you what portion of the chocolate came from the cacao tree, but it tells you nothing about the ratio of chocolate liquor to cocoa butter. Consequently, two bars of the same percentage "can be radically different from each other." One could have added cocoa butter that would result in a less intense flavour. Now, of course it's important to note that those two bars could be radically different for a number of other reasons, including the origin of the beans, but we're simplifying things here to focus on percentage. And if you subtract the percentage listed on the bar from 100, that will give you the percentage of all the other ingredients (sugar, milk products, flavourings like vanilla, etc). 

So, while that percentage can tell you how much of your chocolate bar came from a cacao tree and is "real" chocolate, and give you some indication of "relative sweetness," it can't tell you anything about the flavour or quality of the chocolate, or the ratio of chocolate liquor to cocoa butter. 

The other nugget in Greweling's introductory chapters was regarding the melting point of cocoa butter. During my chocolatier program, we were given guidelines to follow for tempering dark, milk, and white chocolate. These included maximum temperatures for melting before beginning the tempering process. I always wondered why the tempering curve on the bag of Callebaut callets didn't align with those guidelines (in fact, the maximum temperature is much higher than we were instructed). The answer may be in Greweling's explanation of the melting point of cocoa butter. 

Not all cocoa butter is created equal, it seems and they can have different melting points. He notes, "Cocoa butter from beans grown near the Equator, such as those from Malaysia, tends to have a slightly higher melting point than cocoa butter pressed from beans grown in more moderate climates, such as Brazil" (p. 27). This impacts the tempering curve, as well as the working and handling temperatures. It would be interesting to research the source of the Callebaut beans to see if this aligns. 

In any event, there's always something new to learn! And I'm looking forward to reading more next week!

Planning a Christmas Assortment Box

I've always made sweet treats to give to friends and family at Christmastime. It could be a s'mores chocolate bark with Teddy Grahams and mini marshmallows or Skor fudge, or some other confection. But after completing my professional chocolatier program in 2018, I began using Christmas as an opportunity to test new recipes and keep up my chocolate skills. First I would pick a few recipes to bring home to my parents, but this slowly transitioned into creating a small assortment for them. And since the smallest batch of chocolates I make tends to result in 20-25 pieces, I found myself filling about 20-24 boxes, reserving 6-7 to take home, and sharing what remained with friends and coworkers. Once I realized this was going to be "a thing," I ordered four-piece ballotin boxes and some personalized stickers to seal them. 

Last year's four-piece box included a cointreau dark chocolate truffle, a spiced molasses honeycomb toffee dipped in dark chocolate, a milk chocolate salted caramel, and a white chocolate fruit and nut cup with pistachios and dried cranberries. The assortment for 2021 featured a dark chocolate salted caramel, a milk chocolate orange truffle, a marzipan centre enrobed in dark chocolate, and a wintergreen meltaway. And the year before that, the boxes were filled with a sour cherry truffle, a fruit and nut cup with peanuts and raisins, a mint meltaway, and a dark chocolate salted caramel. 

You may see a pattern emerging here. There's always a truffle, because they are delicious and because I've been experimenting with efficient ways of forming, rolling, and enrobing. Sometimes I scoop and sometimes I pipe, but when it comes to enrobing them I've landed on hand rolling as my preferred method. Salted caramels are very popular and standard in most assortments, and they enable me to practice my skills using dipping forks. The remaining two pieces are more variable, but are usually designed to present variety in texture and/or type of chocolate (since my default tends to be dark chocolate). Importantly, across the four pieces, there are some with longer keeping limits, which allows me to produce some of the pieces throughout November, instead of having to produce everything over a day or two in December prior to packing. Some are less labour-intensive (like nut cups and meltaways) and some are more labour-intensive (like truffles and caramels). 

And so as I begin to plan for the 2023 assortment, I'm thinking about ideas for new flavours that have emerged from my chocolate study, as well as considerations of variety in chocolate, technique, shape, and finish, and practical concerns like keeping limits. I've been keeping notes throughout the year, which has led to more than four options, so decisions will have to be made -- like whether to maintain the traditional salted caramel or switch things up this year. And that decision will need to be made very soon, because production starts next week!

What is your favourite piece in a chocolate assortment? 

Candy-Filled Witches' Hats

Last night we hosted a small Halloween gathering. In advance of the soiree, we scoured the internet looking for holiday inspiration and flipped through a few party-planning books that I had forgotten I owned until going through boxes as part of my annual new (academic) year clean-up. After much deliberation, we settled on candy-filled witches' hats. 

First we painted the sugar cones with chocolate, dipped them in some sprinkles, and let them set. Then one at a time, we painted the "brim" of the hat (we used digestive cookies) with chocolate, filled the cone with our chosen candy (Reese Pieces of course!), and inverted the cookie brim onto the open end of the cone, holding it there for just a moment before quickly flipping the whole thing back so that it was point up and the chocolate could set. 

Now, once we mastered this manoeuvre, none of the candy fell out and in about 15 minutes they were set and sealed. But our first few attempts required the intervention of a knife to push a few wayward candies back under the cone. 

Making 8 of these, including setting time for the chocolate and clean up, took about an hour. And we did use compound chocolate to make life easier and avoid the additional time required for tempering.


These are certainly a cute option either as a sweet treat on the table display or popped in cellophane bags as a take-away from the party. I also think it would be fun to stuff these with pieces of cake and some frosting. 

Hope everyone has a spooktacular Halloween!

Smashing Pumpkins

I was away in Ottawa this week for a music conference, so my usual Tuesday night chocolate study didn't occur. And while I certainly hit our capital city with the intention of finding and buying new chocolate to try, my conference schedule was so busy that shopping didn't happen. Other than a Fleur de Sel bar from Hummingbird Chocolate that I picked up in the airport, I didn't stumble upon any other chocolate to bring home. Very disappointing!

But I did come upon "smashing pumpkins" at Rocky Mountain Chocolate in the Toronto airport on my second attempt to return to Sydney. These certainly caught my eye, if only for the price tag of $60 which seemed a little steep. (No, I didn't buy one. With the way people drag so much stuff on board flights these days, it would be impossible to safely stow this in an overhead bin and transport it to one's final destination.)

These hollow chocolate pumpkins are filled with popcorn. And as the name implies, you smash them and eat them. I especially liked the variation of the chocolate skull with a gummy worm hanging out of the eye socket. 

Smashing these sorts of chocolate pieces has become popular in the last few years. Perhaps the most common is a large geometric heart on Valentine's Day -- often they are sold with a small mallet. It's a fun concept and a delicious treat if they are made with real chocolate (and not compound chocolate as is often the case). 

I've seen large moulds for these sorts of pieces before -- most recently a brain mold -- but I've never purchased one myself. I have a bit of a mental block because of the volume of chocolate that would be required for some of these molds (perhaps because the chocolate I use is so expensive). A few years ago, I purchased a set of silicone molds for a chocolate gingerbread house. But once I realized how large the finished house would be, I came to the conclusion that it was unlikely I'd ever make it -- unless I was hosting a Christmas party where part of the event was smashing the house and everyone present helped to eat it. Sure, it could be made more cheaply and easily with compound chocolate, but then it wouldn't taste as good. And while I love the look of chocolate show pieces, I hate the idea of wasting ingredients on something that won't be eaten -- even if those ingredients are cheap or fake chocolate. (And if you're wondering, I am one of those people who eat the gingerbread house after Christmas, soaking the hard cookie in a cup of tea. Waste not, want not.) 

So, no chocolate show pieces for me for now -- and no giant chocolate molds. But I have to be honest -- if I found a giant skull mold, I think I'd be very tempted. 

Chocolate Indulgence

This week, a friend brought a bag of low sugar coconut cups to work. She'd bought them at a big box store and was disappointed with them. Naturally, the solution was to put them in the break room where they rapidly disappeared. 

Curious, I grabbed one for analysis. At 80 calories per piece with only 3g of sugar and made of organic dark chocolate, they certainly have their appeal -- for the "health benefits" of chocolate and their keto- and low-carb-diet-friendly composition. I expected to find alternative or artificial sweeteners on the ingredient list, but didn't. 

I bit into one. The chocolate appeared to be in good temper. At 85%, it came across as very bitter and the centre didn't have a particularly strong coconut flavour. My immediate thought was that it entirely lacked balance. There wasn't enough sweetness to balance the brute chocolate, nor was there any salt. Beyond that, the centre had a strange texture. I returned to the ingredient list and was surprised to see white chocolate listed. Instead of combining the coconut with sugar for the filling, they had set it with white chocolate. Nothing wrong with that of course, but the two ingredients have very different crystal structures that result in different textures.

Now if you're someone who prefers less sweet treats or if you have dietary restrictions that require you to track your sugar, these could be a good choice as an "indulgent" snack (as they are marketed). But they won't give you the same experience of, say, a Bounty bar if that's what you were hoping for. And if that's what you were hoping for, I'm not sure you'll be satisfied. It might make more sense to buy the bounty bar and share it with a friend or save half for another day. 

Interestingly, this taste experience aligned incredibly well with my chocolate study this week. I've moved on from Notter's The Art of the Chocolatier and have started reading Chocolates & Confections: Formula, Theory, and Technique for the Artisan Confectioner by Peter Greweling. This beast of a book is a confectioner's bible. In online forums, it's referenced regularly when chocolatiers discuss challenges with particular centres, formulations, etc. Greweling's recipes often are suggested as the starting point for a chocolatier's riffing and experimentation. 

The first chapter, titled "Confectionary Ingredients and Equipment" devotes 5 pages of very small font to sweeteners, their properties, and their applications. For the confectioner, sweeteners aren't just about flavour, they are about function and form. And, as Greweling points out, understanding sugar's "tendency [to crystallize] and knowing how to control it are two of the most fundamental concepts in confectionary" (p.2). Crystal structure is what gives good fudge its characteristic texture. 

And that's also what gives a Bounty bar is form and mouthfeel -- the characteristics that were missing in the low-sugar coconut cup.


Compound vs Real Chocolate

Much of the commercial chocolate that we consume isn't actually chocolate. In many cases, it's compound chocolate -- a product that generally contains cocoa, but does not contain cocoa butter. If you don't see cocoa butter listed as an ingredient, then it's not "real" chocolate. Of course, there are also confectionary coatings that don't have any component of chocolate in them -- candy melts fall into this category.  

There are some good reasons for swapping out the cocoa butter for an alternative fat (like palm kernel oil). For one thing, cocoa butter is polymorphic, which means that it can take on different structures and thus display different characteristics. Chocolate's ideal structure is beta-5, which is its most stable form. It is achieved through the tempering process and results in the smooth, glossy surface and snappy solid form that we seek in well-made chocolate. When chocolate is not in perfect temper and takes on one of the other structures, the texture, appearance, and mouthfeel are affected. It may be soft or crumbly, or have a dull, grey, or mottled appearance. Compound chocolate, however, doesn't require tempering. It also has a higher melting point than real chocolate, which means it is less likely to melt with handling and can remain stable in warmer conditions. Coating "chocolate" can also be purchased readily in a variety of colours, whereas real chocolate usually has to be coloured by the user (who may add oil-based food colouring or laminate chocolate to a coloured cocoa butter layer). And, finally, compound chocolate is cheaper because it doesn't include cocoa butter. 

Consequently, compound chocolate (or confectionary coating or candy coating or candy melts) is a good option for beginners, for food crafting with children, for large batch/mass production of treats, etc. 

So why am I thinking about this right now as a professional chocolatier when normally I would emphasize the need for only the best couverture chocolate? 

I have an idea for a Christmas present to give to friends this year. It's more about the form (a cute piece molded and assembled from chocolate) and less about the formula (it won't be a layered bonbon or a carefully crafted truffle or other elaborate flavour experiment). Nevertheless, at the end of the day, the item is still meant to be eaten. It would be easier to use compound chocolate to avoid the tempering process, improve ease of storage, and create colourful, displayable, Instagram-worthy treats. But the chocolate won't taste as good as Callebaut. 

The question is, Does that matter?

I know a few people who don't mind candy melts, either as a colourful bark or as coating for cookies. They like the sweeter profile. They likely realize it isn't "real" chocolate, but they appreciate it in various applications despite that. (Personally, I don't mind candy melts, but I definitely notice the difference...) But we've also all had the experience of buying (or receiving) cheap chocolate from a dollar, discount, or grocery store, with its waxy texture or dull flavour -- and it can be very disappointing when the expectation and the reality don't match. 

Does food crafting make the use of "fake" chocolate more acceptable? Or should we be striving to emulate the chocolate genius of Amaury Guichon? Vote and comment below! 

Thanks for voting!

Curry Spice Chocolate

While home in Newfoundland this summer, I purchased a number of chocolate bars by Jacobean Craft Chocolate, a bean-to-bar chocolate maker located in Mount Pearl. Recently, I tried one of their white chocolate creations -- a Curry Spice bar. 

I have to say that I find the packaging of Jacobean Craft Chocolate to be very appealing. I love the colours and the graphic design.

I will admit that when I purchased this bar, I didn't realize it was white chocolate, despite the fact that it says "golden white" on the label. You see, when I arrived in Woody Point, the only store on the west coast selling Jacobean had four bars left. So I did what any self-respecting chocolatier would do -- I bought them all without giving it a second thought!

Opening the wrapper, I was surprised first by the scent of the bar. I could smell curry. Not something similar to or reminiscent of curry, but actual curry. And then I saw the colour of the bar. It almost looked like one of the curry roux preparations that I buy in the local Asian grocery store. It had the characteristic yellow colour with flecks of spice throughout. It was unusual and unexpected. 

The packaging describes the bar as follows: "The bar has BOLD flavours, a very pronounced beginning and end, the cumin | ginger | turmeric provide the base profile while the chili flakes and black peppercorn add the tingle." These tasting notes are accurate.

The earthy flavour of the cumin and the warmth of the ginger come through first. Then the peppercorn and chili flakes take the lead, providing more than a little tingle on the tongue. Finally, that tingle fades and what remains is, once again, the warmth of the ginger. And it lingers.

This is an incredible flavour experience.

Now, let me be clear: this isn't your everyday bar. You aren't going to snack on this while watching a movie or even mindfully enjoy it while sipping a coffee. I don't think it's possible to eat more than a single square at once (which perhaps makes it the ideal chocolate bar for anyone who is counting calories...). But it's entirely worth trying for the flavour profile and sensation on the tongue. It's perfect for a chocolate tasting experience or as fun chocolate course at a themed dinner party. (The chocolate course is a thing, right?)

For someone studying chocolate, this is a masterclass. 
 

Exclusions and Chocolate

In recent years, there has been a movement toward "naked" chocolate bars. That is, the fruit and nuts that traditionally were mixed into the chocolate before molding (referred to as "inclusions") instead are only partially mixed into the chocolate or sprinkled over the top (similar to bark). (Does that make them "exclusions"?) This gives a particular aesthetic to the chocolate, which reads to many as handmade or artisanal, and plays well in the current marketing context where consumers increasingly want transparency about the ingredients in their food and the health benefits of particular ingredients, like nuts, are being used to sell products whether they are "healthy" or not. Given that nuts in particular can be finicky to work with in chocolate, this approach to working with them in chocolate does address the issue of fat migration in the chocolate, but it probably lessens the keeping limit of the bars because the nuts themselves are exposed (and not enrobed in chocolate). It also fundamentally changes the experience of the bar.

A few weeks ago, I purchased a chocolate bar made by Chocolate Voyageur at the FĂȘte du Chocolat at the Fortress of Louisbourg. When I read the label, which stated that it was 76% dark chocolate with candied sunflower seeds, I made the assumption that the sunflower seeds would be mixed into the chocolate. It came as a bit of a surprise when I opened the package and found they had been sprinkled over the top of the chocolate. 

The candied sunflower seeds (roasted with maple syrup) was said in the tasting notes to "balance the citrus notes" of the chocolate. I'm not sure that I got the citrus notes. Instead, the chocolate was more fruity to me. While the sunflower seeds added crunch and a little sweetness to the Papua New Guinea chocolate, the bar wasn't as balanced as I might have hoped (a touch more salt might have done the trick). The "exclusions" were sprinkled over the chocolate and not pressed into it, so the seeds didn't adhere to the chocolate and fell off as I snapped off a piece of the perfectly tempered bar. Consequently, I didn't experience the components of the bar in an integrated way where they enhanced each other, but rather as two separate components that played well together.

This flavour combination, however, does have me thinking. Recently, I've gotten into making my own nut and seed butters. Roasted sunflower seeds combined with sea salt and honey is having a moment in my life right now. And after trying this bar, it occurs to me that a sunflower seed gianduja could make for a delicious centre. Enrobed in chocolate and decorated with a roasted sunflower seed or two on top? Sounds good to me!

How about you? Do you prefer your chocolate to have inclusions or "exclusions"? 


FĂȘte du Chocolat

A few weeks ago, a friend mentioned to me that September 9th would be the date of this year's FĂȘte du Chocolat at the Fortress of Louisbourg. Initially, I was excited to make plans to be there. Then I realized that was the same date as an archery tournament that I'd already said I would attend. Feeling sick about the decision I had to make -- chocolate or archery -- I ultimately concluded (with apologies to my archery crew) that chocolate at the Fortress had to happen and I registered for the 1pm chocolate treat session. 

We arrived at the Fortress just after noon, paid our entry and event fees, and were bused onto the site. When we approached the gate and were asked by the guard what business we had here, I proclaimed, "I'm here to buy all of your chocolate!" He laughed and then suggested I must be wealthy, because chocolate in the 18th century was only enjoyed by those with status and money. After a quick review of the rules (like, stay off the walls), we continued into the reconstructed site. 

After orienting ourselves, we went into a building where visiting Acadian chocolatiers were demonstrating the bean-to-bar process and selling their wares. I purchased a salted maple truffle to try immediately (and it was delicious!), along with a few bars, all from Chocolat Voyageur, a bean-to-bar company in New Brunswick. 

From here, we strolled around the town, walking through the streets. Eventually, when 1pm came, we made our way to the kitchen of the engineer's residence. 

We were joined in the treat-making workshop by a reporter from Saltwire. Though we asked that we not be photographed, my hands and truffles did indeed show up in a photo essay that was published online (I have no idea if anything made it to the print edition). 

We had a quick orientation by the interpreters, before proceeding around the corner to wash our hands. What a surprise to suddenly be in a modern, commercial-style kitchen! We donned aprons, passed back over the threshold, and returned to the 1700s. (It retrospect, it felt a little like Outlander...)

As we selected our ingredients for finishing truffles, the interpreters told us more about chocolate during the time period and the house that we were in. It turns out the engineer must have been very wealthy and esteemed -- he apparently had 29 lbs of chocolate under his bed! In that time it would have been very expensive. And that's three times as much chocolate as I, a chocolatier, have on hand right now!

I couldn't resist photographing the cone of sugar and ball of chocolate that they let us handle. I've often read about cones of sugar and the work that went into preparing recipes when you had to begin by chiseling sugar from the cone, but I've never seen one in real life. 

The treat making workshop focussed on making truffles with a hint of Fortress Rum. Now, this is a little anachronistic, since cream truffles as we know them (at least according to the common origin story) only came to be in the late 19th century and some of the ingredients on the table (coloured sugar and nonpareils), while they may have existed in the 18th century, are unlikely to have been in the modern form provided. That said, it's a fair enough substitution. After all, some of the information provided in the tavern's PowerPoint presentation indicated that chocolate at the time might be combined with spices and egg yolk and molded -- and egg yolk truffles are indeed still a thing (not that I've ever made one -- the keeping limit is significantly reduced, from what I remember). Cream-based ganache is simple to execute and also avoids a common allergen when working with the public.

We were presented with a ramekin of ganache and a spoon for scooping (which we both accidentally bent during the scooping and discreetly bent them back into shape). I'm not sure if the chocolate used in this instance was the heritage chocolate produced by Mars, but that is what was listed on the recipe card. The splash of Fortress Rum gave it a nice flavour without being overpowering. 

We scooped and rolled, and chatted about chocolate. I made two rolled in ground almond, two rolled in sugar, and three rolled in nonpareils. Interestingly, they also provided raisins and roasted coffee beans to put inside the truffles -- something I've never done before. I opted for the coffee beans and I have to say that I was very impressed by the end result. The addition of a little crunch in the centre of the smooth, creamy ganache was a nice texture variation, and something I could imagine doing in the future (imagine a pistachio inside a cranberry truffle, for example). 

When we were done, we stepped through the portal back into 2023 and washed our hands before packaging our treats and heading back out into the 18th century town.  

Out on the dirt road, I spotted an interpreter. "Which way to the tavern?" I asked. She chuckled and gave us directions. A few minutes later, we strolled into an 18th century tavern that was playing 1980s music. Interesting juxtaposition. The joint was jumping. We ended up sharing a table with another couple and ordering a flight to try the ĂŽle Royale Saison, a special Fortress beer made by Breton Brewing. The kind bartender substituted one of the other beers in the flight for an Island Folk Cider. We sipped our beverages while watching the PowerPoint on chocolate and snacking on our truffles (which, by this point, were very soft and sticky). 

From the tavern, we strolled around a little more, finding a cafĂ©, pausing in the chapel, jumping from fright at the unexpected firing of a musket. 

It was a great day. 

My only regret is that I didn't bring a lunch bag with a small ice pack to carry our truffles. Yes, I of all people should have known better -- but it just didn't cross my mind as I left for the day. Our truffles slumped and melted into each other. But after a few hours in the fridge, they were just fine for eating after supper. 

I would love to be part of the FĂȘte du Chocolat someday. Maybe not as a vendor, since I don't do bean-to-bar production, but I would LOVE to dress up as an animator and run the truffle workshop. I wonder how a person could volunteer for that gig? 

Stayed tuned... Next week I'll tell you all about that bar made by Chocolat Voyageur!


Spruce Tip Truffles

This week's chocolate study was an experiment that I've been meaning to do for, oh, five years or so? (But who's keeping track?)

During my professional chocolatier program, I got the idea that I should try making truffles with ingredients that are either traditionally part of Newfoundland foodways (like berries and molasses) or that were grown in Newfoundland (like hazelnuts and spruce tips). Fresh spruce tips, however, were not in season at the time that I was completing my various assignments. Freeze dried spruce tips weren't available either and I just couldn't imagine that pickled spruce tips would work. I put the project on hold. 

Spruce tips, if you aren't aware, are high in vitamin C. Depending on the variety and time of harvest, they can have a citrus-like or piney flavour. When left too long, I'm told they can smell like cat urine (definitely not the desired flavour profile). 

A year later, while visiting my sister, I spied the almost lime green, new growth on some trees. I quickly gathered a small bag to take back with me. I froze them and took care to transport them in a cooler, and then they landed in my freezer. Admittedly, I forgot about them for a few months (or more than a few months). And then the great power outage of 2020 struck. My apartment was without power for a month while I was on vacation in another province and the entire freezer had to be gutted (by a friend who deserves more and better for her efforts). So long, spruce tips.

Eventually, I had the opportunity to pick a new batch of spruce tips locally and once again popped them into the freezer (to languish...). But they found their way out of the freezer this week when I decided the time had finally come. 

I had leftover heavy cream. I had a small stash of spruce tips. And I needed a topic for a blog post. 

I heated the cream to a simmer and then added the spruce tips. Then I removed the pot from the heat and let the spruce tips steep for 30 minutes. Next, I weighed out chocolate for a small batch of truffles and added the appropriate amount of cream. A quick 90 seconds in the microwave and I was able to whisk together a luscious ganache. After leaving it to cool for a half hour, I scooped out 26 truffles and left them to crystallize. Then I refined their shape and rolled them in cocoa powder. 

Ta da! Spruce tip truffles!

Now, when I tasted the cream before combining it with the chocolate, it had a pronounced woodsy flavour. But the dark chocolate (not surprisingly) overpowered the spruce tips in the final mix. Consequently, the flavour is faint and doesn't register at all if the truffles are eaten cold.

I think the concept is solid, but the execution leaves something to be desired. First, additional experimentation will be necessary to determine the best ratio of cream to spruce tips -- and that will likely have to wait until next spring when I can harvest the tender tips once again. I am curious, however, about the possibility of acquiring some freeze-dried spruce tips and amping up the flavour by pulverizing some and rolling the truffles in the powder. Second, I may have to swap the 54% chocolate for white chocolate, which would provide a more neutral base for the delicate flavour. 

Nevertheless, I'm happy to finally have brought this idea to life and thrilled to have a container of delicious truffles in my fridge for a hit of chocolate whenever I like. I can see chocolate season approaching and I'm looking forward to putting new ideas into practice. And while there won't be a spruce tip truffle in this year's chocolate box, I'm sure there will be other delicious options.

Carrot ganache?

Recently, I've been in a bit of a decluttering and organizing mood. It's something that strikes a few times a year and almost always occurs in August as the new academic year approaches. I try to lean into it when it does hit, because typically it is fleeting!

And so earlier this week, as I began moving some documents from my bookcase and into wooden magazine racks that my mother gave me when I was home in July, I also started pulling items from the shelves to relocate or rehome. A copy of Canadian Folk Music magazine that evaded a purge during the pandemic, the documentation from a real estate transaction that was never completed, lecture notes from a course I taught a decade ago... Then I spied a copy of Wildness: An Ode to Newfoundland and Labrador. My sister had received it years ago, I think as part of a prize package featuring Newfoundland authors, and gave it to me. I recall flipping through it at the time, but it came to rest in my office and has lived there ever since. I pulled it down, fully intending to toss it in a rehome bin, but then decided one last look was warranted. 

The first cook book of chef Jeremy Charles, Wildness captures some of the spirit of the people and landscape of Newfoundland that was featured in Parts Unknown with Anthony Bourdain. The book highlights traditional ingredients from Newfoundland foodways and demonstrates how they are reimagined in Charles' emerging modern cuisine. Think rabbit ravioli and molasses lavash. 

As I reviewed the recipes, I thought that many were interesting, but few seemed like recipes I would actually try myself -- though I will admit that molasses madeleines do have me curious. I concluded that I'd rather visit St. John's and eat at one of his restaurants (while I believe Raymonds closed as a result of the pandemic, the Merchant Tavern appears to still be open). Not surprisingly, I found myself skipping to the dessert recipes and focussed my time there. 

Sure enough, there were a few chocolate recipes. One was a spiced carrot cake with ricotta cheese that calls for a carrot ganache (), made of carrot puree and white chocolate, but after reading the recipe a few times and reviewing the plating, it's unclear where and when the carrot ganache actually appears in the dessert. My mind, of course, has gone to its potential as the centre for a bonbon (perhaps in a Christmas collection). Could you imagine eating a spiced carrot truffle? đŸ€” The other was an alder ganache chocolate, made with alder-infused cream. If you're willing to forage your own alder pepper, the recipe sounds interesting, but the resulting quantity seems high for the home cook, especially when experimenting with this sort of flavour. 

Interestingly, both recipes call for glucose. From prior chocolate reading, I understand the primary role of glucose to be in the production of improved mouth feel or texture in the ganache. I've never used it in a ganache because it isn't necessary, but now I do wonder whether it would be worth trying it. 

Perhaps my most important takeaway from this recipe study is the method employed for infusing the alder pepper in the cream for the ganache. I've been contemplating how to make a spruce tip ganache for a while now and had been leaning toward an infused cream. Charles' cook book has confirmed that as an appropriate approach; however, where he infused the cream for 30 minutes, it will likely take some experimentation for me to determine the length of time required to infuse the spruce tips, given they would have a more delicate flavour than the alder peppers. 

As fall approaches and the temperatures become more conducive to working with chocolate, there may be an experiment in my future. 

And, for now, Wildness will escape the back-to-school purge.

Azul Master Chocolatier

You may have noticed that, against all odds in the midst of high-tech competition, board games and puzzles have proliferated. This boost originated well before the pandemic, but was certainly aided and abetted by it. 

My return to board games started about a decade ago, when my coworkers were avid players of Settlers of Catan. I think Big Bang Theory in particular had influenced them. Periodically we would arrange a board game night or even play over our lunch hour in the board room. A few years later, I joined a book club and there were a few board game enthusiasts in the group. We periodically got together to play a variety of different games. 

As I was introduced to new (to me) games, my personal collection started to grow. I purchased Settlers of Catan and Ticket to Ride. I arranged a game night with friends to play Apples to Apples (let's not talk about my now infamous pairing of "ancient" with "my friends," which I thought was hilarious but went over like a lead balloon...). I received board games as presents, including Pandemic (oh, the irony that real life would soon emulate a game!) and one based on the TV show Dexter (it had tiny garbage bags, so, really, it was a must-have). More recently, my friend Tanya introduced me to Azul: Stained Glass of Sintra. I loved it so much that I bought a copy and brought it home with me on vacation a few summers ago. I played game after game with my sister in her camper -- it's addictive.

Then in March of this year, an unexpected message came on Facebook. In a group chat, a screenshot showed the image of a limited edition version of Azul, called Master Chocolatier. "Janice!!!" said Tanya. "I need it!" I replied. I ordered it immediately.

Now, did I reeeeeeally need it? Probably not. But when being a professional chocolatier is part of your identity, it's hard not to be attracted to (and collect) chocolate "things."

When the game finally arrived in April, I was excited to arrange a time to play it. But life intervened and plans fell apart. And it's been nagging at me for months that I hadn't yet made good on that. The road to hell is, after all, paved with good intentions. And so last week, I decided it was fair game to play Azul: Master Chocolatier on my chocolate study night. I sent the girls a message and we made a plan.

Now, let's be honest: playing this game doesn't really qualify as chocolate study. I know that. You know that. Let's just agree to give me a pass this time.

And so earlier this week, I finally had the opportunity to play Azul: Master Chocolatier with Tanya. For an overview of the game play, I recommend this tutorial on YouTube. But basically, you draw pieces of "chocolate" from the factory, and, following the rules of play, you pack a box of chocolates. When a horizontal row is completed, game play stops and the winner is the person with the most points. (Azul always has a complicated scoring system, so just play with someone else who knows it already and can tutor and correct you, like Tanya did with me!)

All of the Azul games are visually appealing, and this one is no exception. The boxes are beautifully designed with vibrant colours. I absolutely love the dark chocolate and milk chocolate pieces that look so much like bonbons you'd see in a chocolaterie. It is a little disappointing that the solid white and ruby "chocolate" tiles have no patterns or  embellishments, but that's a minor detail, I suppose. It's a fun theme and with two different set ups, you have the option of more advanced game play.

Of course, the recommended snack for Azul: Master Chocolatier has to be chocolate! We had a few pieces of a Peace by Chocolate milk chocolate bar. 

You can't beat an evening that combines a fun game with a delicious snack and great conversation. 

And chocolate study can wait for another day. 


Chicken Bone Nougat?

On a recent trip to Peggy's Cove, I noticed Bubba Magoo's Fudge on the map of nearby shops. Naturally, I had to stop. So, after enjoying the view and taking the obligatory lighthouse photo, we headed for a purple building that really stood out. 

Bubba Magoo's offers small batch fudge, brittles, and jams, as well as freshly baked cookies. Based on their website, it appears these are "house-made." (I bought a peanut butter fudge.) They also have an incredible assortment of candy available -- but it's obviously "industrial" candy (like sour keys) that definitely isn't locally made. And then there's the in-between. A subtle distinction appears on some of their packaging -- "Maritime-made" with a maple leaf. This was the case for the most interesting item in the store: Chicken Bone Nougat.

I did a double take. Yes, I'd read the label correctly. 

Now, anyone who knows me, knows that I love chicken bones. And a few years ago, chicken bones were having a moment. Moonshine Creek Distillery decided to make chicken bones liqueur. I lamented on Facebook about my inability to purchase a bottle locally. That Christmas, I received four bags of chicken bones as presents, along with the highly sought-after liqueur. It was incredible in hot chocolate. The following spring, I made a pilgrimage to Glace Bay to try a chicken bones cheese cake. Everything was coming up chicken bones! And then the moment passed.

Until last week. I found the nougat! (Or did the nougat find me?)

It turns out this chicken bones nougat is made by Ganong, though nothing on the label indicates that. Bubba Magoo's has obviously repackaged it for sale in small bags at a premium. Don't get me wrong -- it was going home with me regardless. But I do believe in truth in advertising and origins of chocolate, so I feel like somewhere on the package it should have said where it came from. 

Nevertheless, it was a delicious bite. A soft, creamy pink centre with that characteristic cinnamon flavour enrobed in dark chocolate. From my Googling tonight, I've learned that these were (re)introduced in the Delecto boxes of chocolate in December 2013. (I say "re" because I've read comments that suggest they used to be in boxes "a long time ago" and that "they suck now," suggesting they were better before.) And the chicken bone on the cake is that Ganong suggests you use them in their cheese cake recipe

I have no idea how these could have existed for a decade without me knowing. 

When I first found these in Peggy's Cove, I was curious about how a chicken bones nougat could be made. Now that I've tried several, I'm actually thinking they are a "cream" molded in starch and then enrobed in chocolate, rather than an actual nougat that would be slabbed and cut into pieces for enrobing. A nougat would have had a chewier texture. 

Am I contemplating making my own version? Of course I am. I have a lot to think about in terms of how the texture and flavour could best be achieved. But tasting these has reaffirmed what I've always known: that chocolate and cinnamon deserve to be together more often.

And I'm making a note of that in my book of chocolate inspiration.