Maple Molasses?

Last week, I received an email from Crosby's introducing their new product: maple molasses. Curious, I followed the link to their website. Sure enough, they have blended maple syrup and (presumably fancy) molasses into a new offering. While I think it is meant to be a pancake syrup, they are releasing new recipes featuring it as an ingredient. First there were muffins, then there were cookies. Both seemed appealing. 

Unfortunately, Crosby's Maple + Molasses doesn't appear to be available in local stores yet and I wasn't about to pay the exorbitant shipping fee ($24.01!) for the $8.99 bottle, so I quickly returned to my previously scheduled programming. 

But the "Wholesome Maple + Molasses Peanut Butter Muffins" had infiltrated my brain and I couldn't stop thinking about them (peanut butter fiend that I am). And so I returned to their website to read more about the product. The label states that the product is 70% maple syrup, which was enough information for me to mix my own reasonable facsimile. I was in business! (Metaphorically, of course. I am not going to be producing a Maple + Molasses knock off for sale.)

The recipe for the muffins was of interest for the inclusion of both rolled oats and peanut butter. In my head, that meant fibre and flavour. They were quick to mix up, taking less than 10 minutes, and they baked in only 18 minutes. Voila!

Now, I'm not sure how wholesome these muffins actually are. They have three different types of sugar (brown sugar, maple syrup, and molasses) and they contain peanut butter, which is typically high in fat. According to the online calculator I used, they contain 180 calories, 4g fat, 2g fibre, and 5g protein. Of course they do wonderful things for one's mental health, so everything in moderation (including moderation) and all that jazz. 

The texture is light and fluffy, which is surprising considering they contain old fashioned rolled oats. They aren't overly sweet and the peanut butter flavour is present but not overpowering. If you really wanted to be extra, you could add peanut butter Chipits or chocolate chips to these, or even some nuts.

Definitely a keeper, as Trooper Ron would say!


Fruit & Nut Bars

After a brief break from my chocolate study, in pursuit of other kitchen adventures (like Oven Porcupines and Cranberry Orange Muffins), I decided it was time to get back to it. This week's endeavour: transform the remains of a delicious milk chocolate Easter bunny.

Now, you may be wondering why one would want to transform an Easter bunny instead of just eating the Easter bunny. That's a fair question. The bunny was mostly solid and quite thick, so biting into it felt like it might damage the teeth. Instead, I found myself attacking it in rather gruesome fashion to chop it into more manageable pieces. I decided the best thing to do would be to melt it down and turn it into something else, like chocolate bark. And that's when I started thinking about some inclusions I had on hand in my chocolate stash. 

Over the years, I've experimented with a variety of freeze-dried fruits and berries. Most commonly, I've ground them into a powder and used them to create truffles and other chocolates, but I've always wondered what they would be like used whole or chopped into pieces. Would the texture be too dry and unpleasant? Would it be chewy or sticky? Could it be used to create a naked chocolate bar in the same way that dried fruit is? There was only one way to find out. 

I took a knife to the bunny and chopped it into small pieces. The milk chocolate chunks weighed 130g. Now, that's a very small amount of chocolate to work with and almost impossible to temper, but I decided not to add callets because I didn't want to waste ingredients if the experiment failed. With the chocolate prepared using the direct tempering method, I added about 8g of freeze dried blueberries and about 15g of chopped walnuts. I stirred them in and then poured the chocolate to a silicone bar mold. I had enough to make four small bars. I popped them into the fridge for 15 minutes and once they were set, I unmolded them. 

The result? Four tasty chocolate bars. While they have some of the characteristic shine of well-tempered chocolate, they also have a bit of a mottled finish as a result of using a silicone mold that can't be polished in the same way that polycarbonate molds can. Since these are a test, that doesn't bother me. The focus of this week's experiment, after all, is texture. 

I'm quite surprised to report that the freeze dried fruit is delicious in this application. As hard as it is to believe, I wasn't really able to tell that the blueberries were freeze dried. They had a bit of a chew, but not unpleasant, and they weren't dry or chalky at all. My fear that they would be unpalatable was unfounded.  

Fruit and nut is a classic combination. And using freeze dried fruit and berries is definitely worthy of further experimentation, particularly in chocolate bark. 

What fruit and nut combo would you like to see? 

Oven Porcupines

Recently, a friend loaned me her copy of the Betty Crocker Recipe Card Library. This sparked discussion of a few of the well-known recipes, including "Oven Porcupines," which were known in my family as "Porcupine Meatballs." Naturally, I had to try making them. 

Now, I tend to think that I have a very well stocked larder and an impressive collection of herbs and spices. But this simple recipe nevertheless required a trip to Bulk Barn to get something I've only used once before in a tuna salad creation about two decades ago: celery salt. Fortunately, I was able to purchase a few tablespoons (aka a lifetime supply) for the low cost of $0.31. 

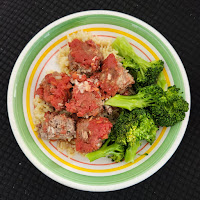
Armed with my ingredients, I set about preparing this dish. I immediately ran into a problem as I mixed the ingredients and attempted to form balls -- they just wouldn't hold together. I ended up adding an egg to bind the mixture. With all of the balls formed (about 25 in total), I was ready to put them in the oven. Following the instructions, I soon encountered a second problem: the rice wasn't cooking. After an hour, it was still crunchy. I added more water. I left the meatballs in the oven for additional cook time. I cursed under my breath. I cursed loudly. Eventually they were edible, but they definitely did not cook in the time outlined in the recipe. I ate them with some brown rice and broccoli.

If I were to make these again, I would probably ignore the instruction to use "regular" rice and instead swap it for converted (parboiled) rice to ensure that the rice cooked in a reasonable time. (It's worth noting that the new version of this recipe on the Betty Crocker website does just that -- more on that in a moment.) I'll admit that I was surprised to find that the half teaspoon of celery salt did make a difference and gave the meatballs a delicious, unexpected flavour. So, it's worth the trip to the store to buy it if you don't already have it. 

Now, if you're curious to try these yourself, here is the original recipe. Beware! The new version on the Betty Crocker website is nothing like the original (calling for Multi-Bran Chex cereal) and the reviews are not good. And definitely consider using converted rice to make your life easier.